There are many ways to approach scenic design and production for shows, films, TV, and events. The single most important thing is finding a design and production workflow that frees you up to concentrate on your creative process.
Vectorworks Spotlight is a single application at the center of your entire design and production process. Continue reading to see how you can use the powerful tool.
Getting Started with Scenic Design
In the initial stages of any creative design process, many things need to be considered to deliver a successful set or scenic design. Most of these factors will be the same no matter what type of show or event you're designing and will not change the basic steps in your creative design and production process.
Theme/Concept
Normally, your scenic design and production process will start with some form of design brief; it could be a script, an event concept, or a themed exhibition stand. Depending on who you're working with, you may have access to additional resources like storyboards, mood boards, or company branding guidelines.
Existing Resources
An important factor in any live entertainment design is whether you can use or adapt existing sets and scenic elements from previous shows and events. Also consider the use of standardized equipment and scenic elements, like stage decks and scenic framing systems, that can be integrated into a design to reduce the amount of custom fabrication required to construct your design.
Reusing additional resources is also a great way to make your project more sustainable.
Available Space
One of the most essential considerations in any scenic design is the size and shape of the space in which you'll build your set. This is especially true for touring productions of any sort, as different venues may vary greatly in size.
The space will define important factors like sightlines and access routes for set and scenic elements, performers, and the public.
Initial Layout
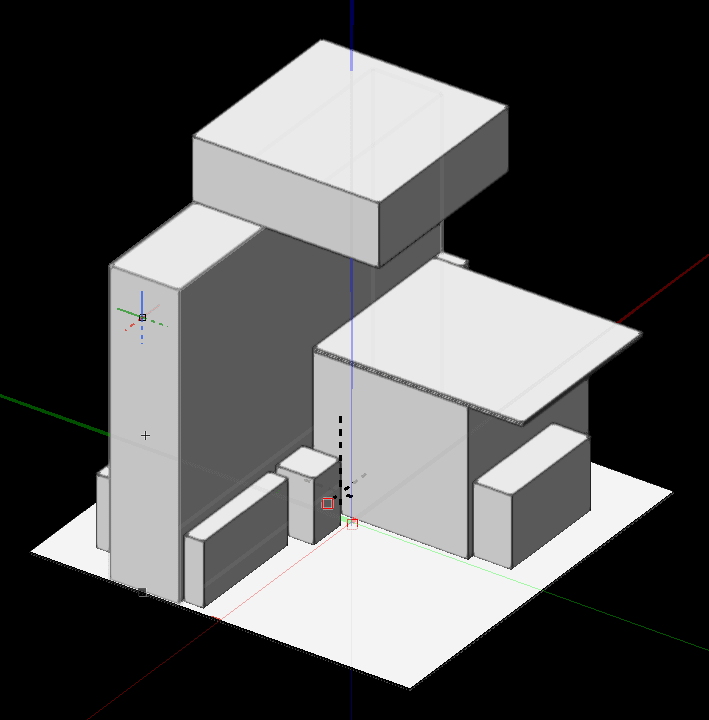
After you have an initial idea or concept for your project based on the design brief, it's time to start looking at layouts and dimensions. The easiest way to do this is to start in 2D with a basic floor plan and then place your set elements as simple outlines. This lets you quickly get a feel for the space and how your design will interact.
Your rough 2D layout can then be used to create a 3D massing model to further refine how your design will fill the space and help you get a good idea of sight lines, access, and other basic factors dictated by the available space.
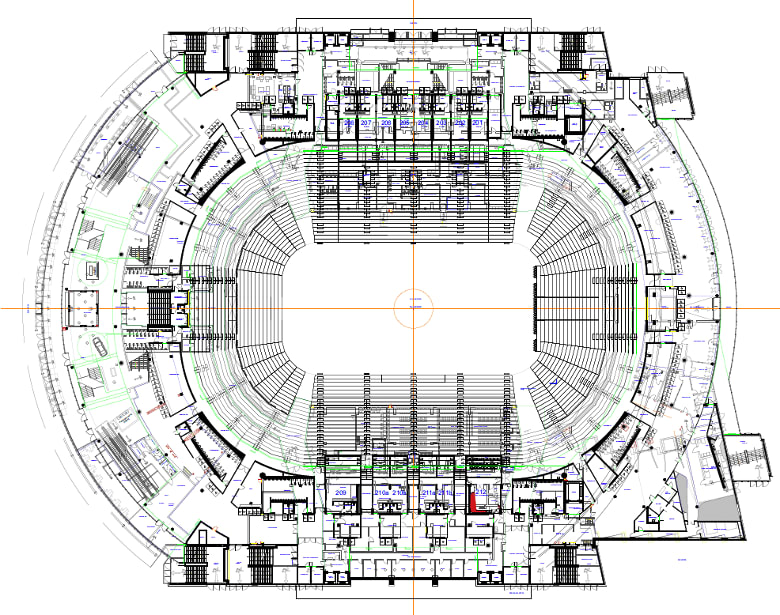
Venue/Site Model
Knowing how much available space there is for your set or scenic design isn’t only about the basic floor area available to you. There are lots of other factors involved —some depend on the type of show such as stage size and others are more general such as sight lines and access routes.
The best way to get a better feel for the space your design will be in is to create a venue or site model that includes all the major elements that could affect your design.
Vectorworks Spotlight has a number of options that you can take advantage of to help you quickly create your venue or site model.
One of the most common is importing a 2D floorplan as a DWG or a PDF. This can then be used as a reference to create a more useful 3D model by using the 3D modeling and building shell toolsets.
RELATED | USING DWG FILES IN ENTERTAINMENT DESIGN
You can also import an existing venue or site model. Vectorworks Spotlight supports importing a large array of file types to make starting your project as easy as possible.
For simple spaces, use the event design menu commands to quickly create a 3D space complete with walls, floor, and staging elements that can then be detailed as needed.
If you require an accurate model and have the resources available — time, money, and equipment — you can use a point cloud scanner to create an accurate 3D model of your venue or site.
A key point to remember when creating your venue or site model is the level of detail that you need for your project. For example, in the case of an expo stand, you only require a basic 2D floorplan, whereas a complex theatre-in-the-round setup will likely need a more detailed 3D model for sight line planning.
2D Layouts
Once you have your venue or site model, the next step is to create a rough 2D layout of your set or scenic design. Since the objective at this point is to better understand the available space and how the set and scenic elements will fill it and interact with each other, you don't need detailed or complete models, just basic 2D outlines of the major elements and any space planning for the show or event.
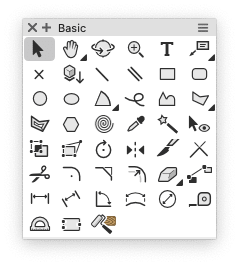
The Vectorworks Spotlight Basic toolset contains a wide variety of 2D drawing and measurement tools that enable you to draw any 2D shape or object that you can imagine.
Another useful step you can add to your workflow here is rough area layouts. Most events will have the site or venue divided into areas by function or use — for example, a dance floor or emergency access route. Again, this is done with simple 2D geometry objects, and you don't need to be very detailed. The objective is to help you understand your available space and how it affects your set or scenic design concept or idea.
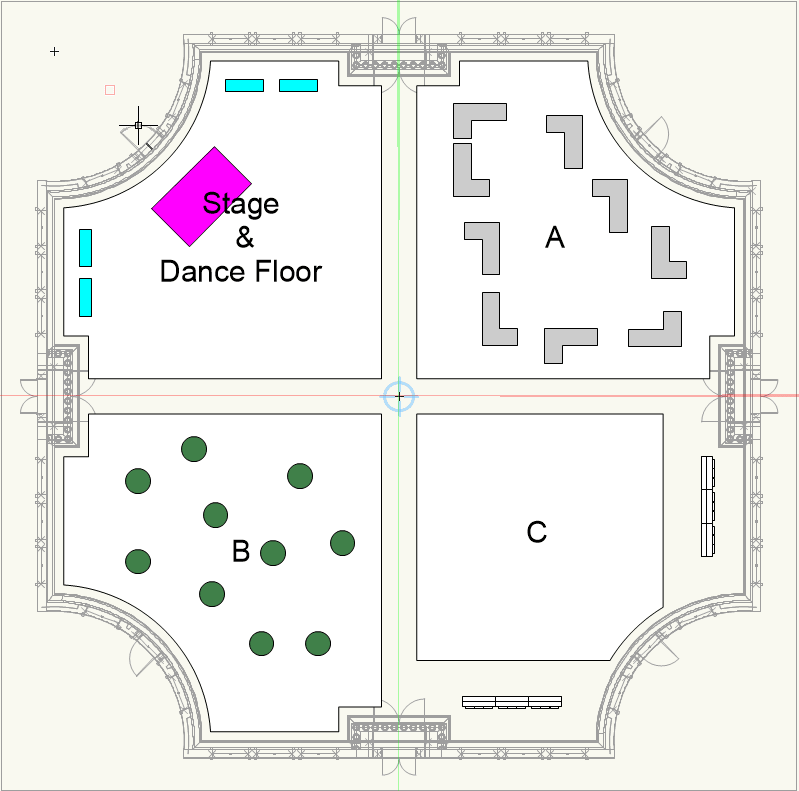
Suppose you need to prepare layouts for multiple scenic configurations to layout scene changes. In that case, it can be useful to duplicate the 2D scenic objects on separate design layers or classes so you can preserve specific layouts.
Conceptual Model
Originally an architectural design technique, massing models are simple 3D objects used to define the general shape and form of buildings and their surrounding environments. It can also be used in entertainment-focused set and scenic design. This process is not intended to provide an accurate, detailed set and scenic models; rather, you're looking at the overall relationships between the elements of your design and the available space.
Your initial 2D layout objects can be rapidly converted into simple 3D objects in Vectorworks Spotlight using a variety of tools and commands, such as the Extrude command or the Push/Pull tool from the 3D toolset. When you combine these 3D objects with your venue or site model, you'll better understand how your set and scenic design will fill the available volume. You'll quickly see how the elements interact with each other.
By adding or removing mass using the Modeling Menu commands or 3D toolset, you can rough out your design in 3D to maximize the space and finalize the basic volumes that your set and scenic elements will occupy.
Rough Modeling and Sizing
You should now be ready to start refining your design, to transition from the simple 3D outlines of your massing models into more detailed objects that have the major elements of their geometry defined. At this stage, you should look at factors like human interaction (performer or other) with your design, functionality, structural elements, access, and sight lines. Your objective here is to finalize the basic geometry details and sizing so you're ready to move on to the detailed modeling, coloring, and texturing.
Event Design and Building Shell Tools
One of the biggest advantages Vectorworks Spotlight offers is the ability to use many of the event planning and building shell tools to create complex objects like doors, stairs, or windows, which can then be modified using the 3D modeling tools.
Using this technique enables you to rapidly create many of the more commonly used set and scenic elements that you need for your design, allowing you to devote more time to the more complex custom elements.
The key to this technique is ensuring you ungroup the object you want to edit in a 3D view. Otherwise, you'll be left with only the 2D geometry of the object and not the more useful 3D geometry that you'll need when using the object as a starting point.
3D Modeling Tools and Commands
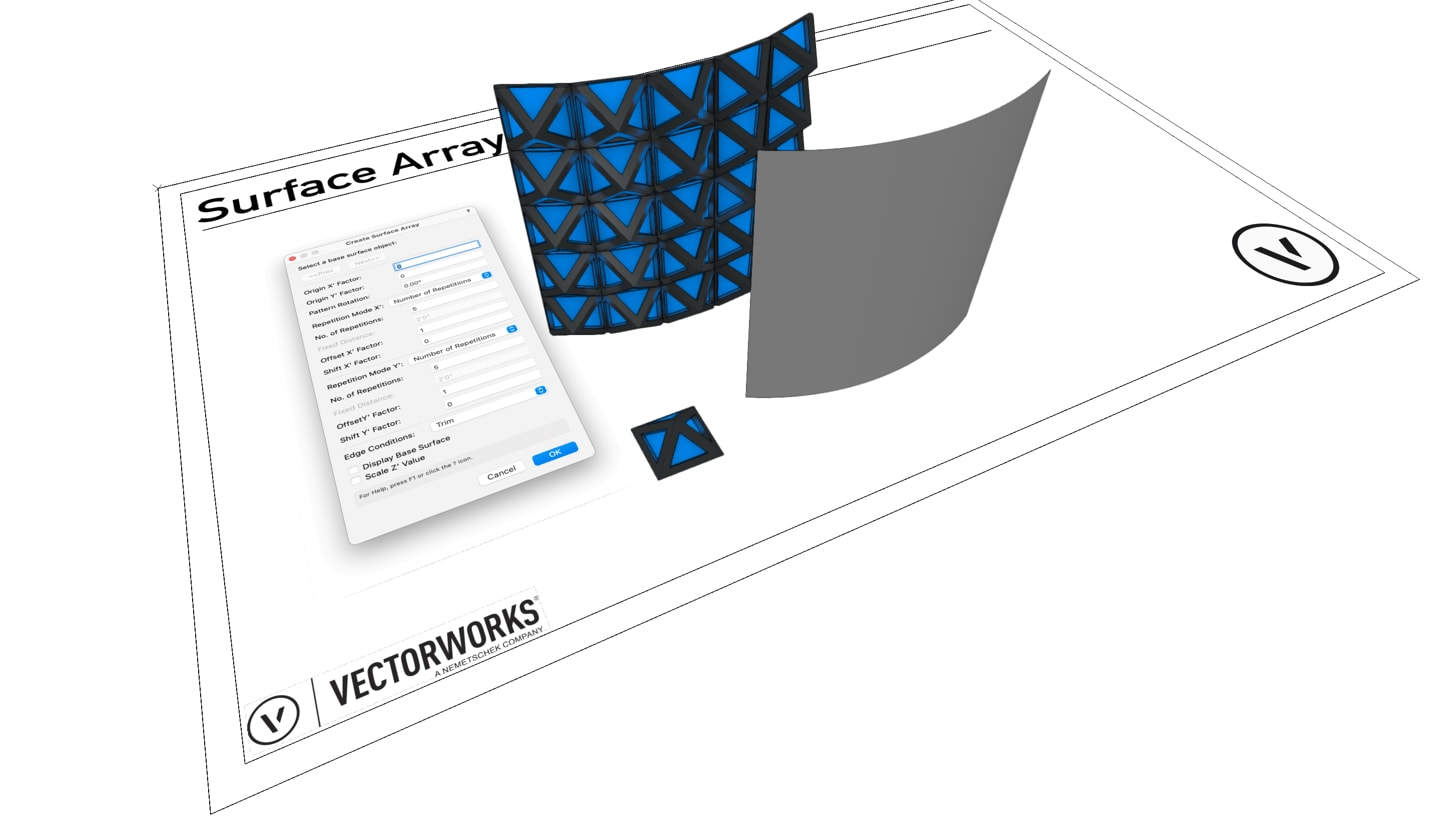
You can create any shape or object you want with multiple types of 3D modeling methods in Vectorworks Spotlight. 3D modeling options include:
Many common set and scenic elements can be easily created using specific tools or commands. Examples include:
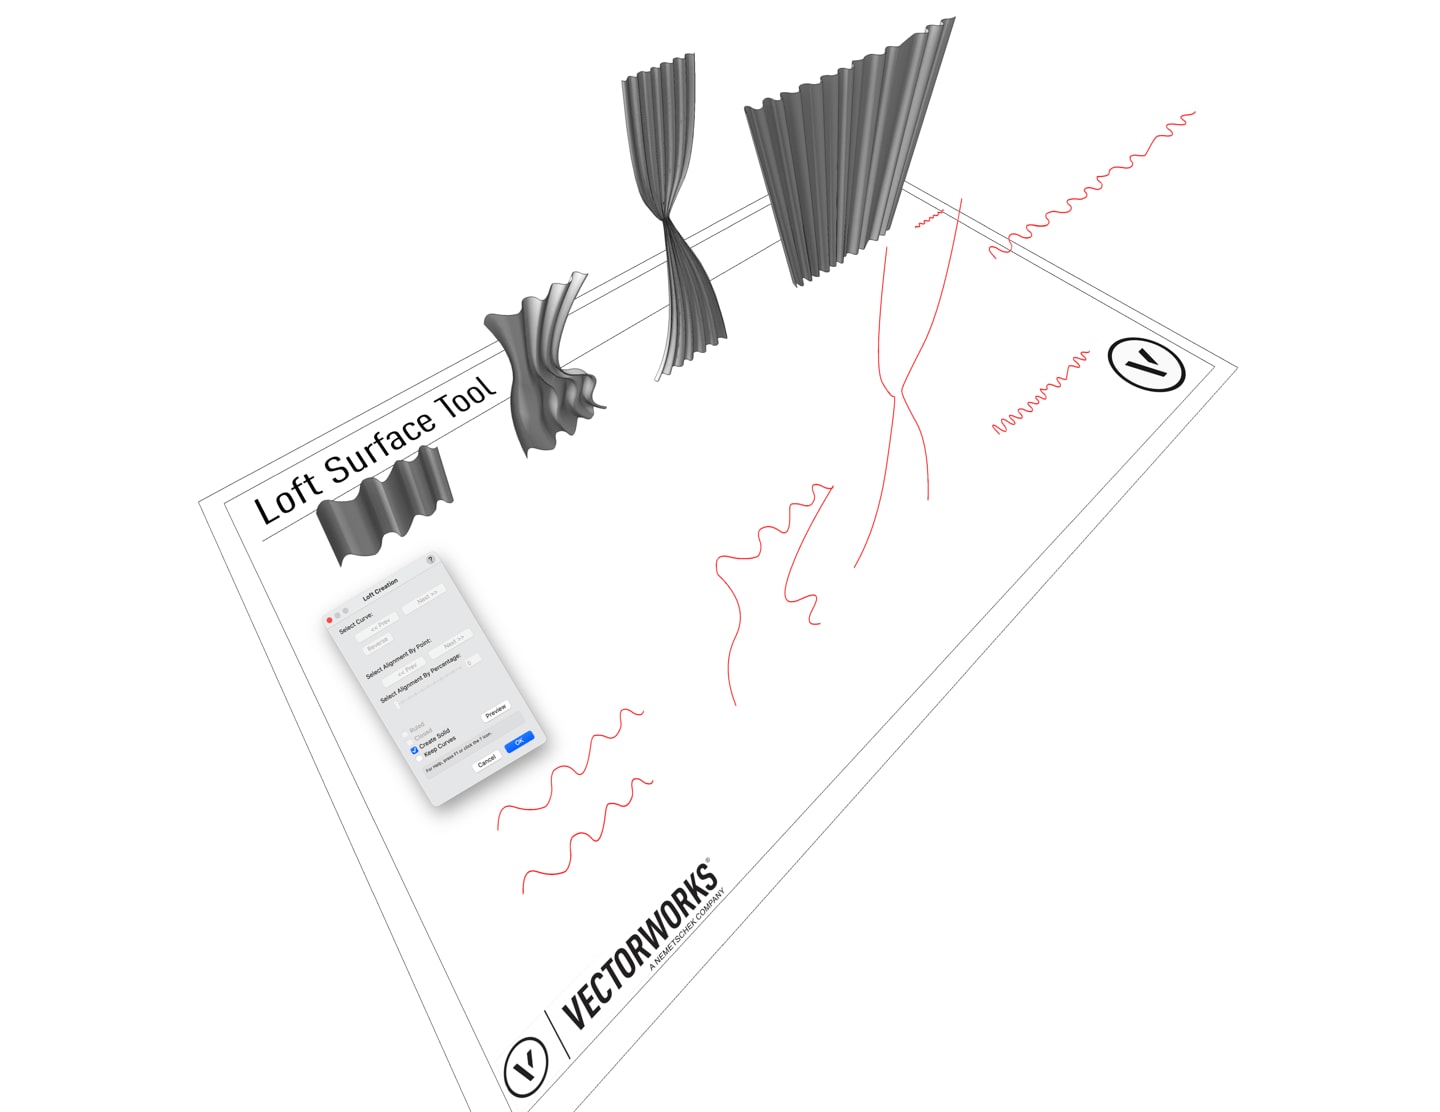
- The Loft Surface tool is perfect for creating complex drapery and curtains.

Scaling Objects
Correctly sizing your set or scenic design is not only about how much space or volume the various elements occupy. It's also about how it relates to anything else that it has to share the space with, such as performers, the general public, equipment, etc.
By using the Scale Objects command, you can rescale the X and/or Y dimension of any selected solid, object, multiple objects, or group and rescales the selected items uniformly in the X, Y, and Z dimension.
When scaling by distance, the object can be rescaled by indicating a segment in the drawing or by specifying a new distance for the segment.
Sight Lines
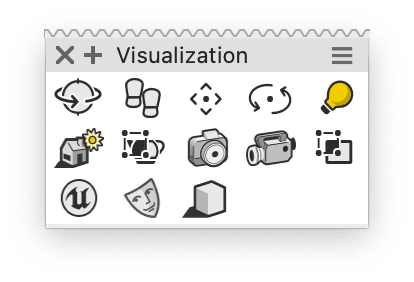
You'll likely need to check sight lines no matter what project you're designing. This could be for camera planning or to ensure that an expo booth will stand out from its neighboring booths. Several options in Vectorworks Spotlight will aid you in this process. Look to the Visualization toolset.
Access
Checking access is about more than just making sure that emergency exit routes are clear and that there's enough space for performers and the public. You also need to consider whether there's enough space to assemble your design, how crew members access equipment inside the elements for maintenance, and if your design includes moving parts or automation, that there's enough space for this to happen safely.
- Use your floor plan and massing models to check if your design can be laid out flat in the space for assembly.
- Can your design be assembled outside of the main space and moved into position afterward? Does your design need to be assembled in a specific order to be able to build it in the available space? If there isn't enough space, look at how you can split the various scenic elements into smaller objects that require less assembly space. Allowing for this now will avoid complications later in your design process.
- Look at how much space your crew needs to build equipment into the various scenic elements during construction and how the equipment can be accessed for maintenance afterward. Reference objects from the Vectorworks Spotlight libraries are beneficial for this process.
- For moving elements and automation, you can add extra 2D and 3D geometry to your scenic elements to display their movement radii.
- Move the scenic elements around in your design and check that in each location, there's enough space for any planned movements by turning on the movement radius class visibility.
Detailing
Once your design elements are sized and roughly shaped, it's time to add the important details that will make your design stand out. These include fine modeling, adding colors and textures, and, just as importantly, looking at how the design will be built. You may or may not be directly involved in the construction of your design, but you always need to consider how it will be built, as this can affect your project budget, contract bids, and potentially the design itself.
Complete the 3D Model
At this stage, the modeling is all about adding important fine details to the set and scenic elements' geometry. You must make sure you pay particular attention to any elements that will need to be custom-built, as you will need to be able to produce accurate construction plans based on the geometry.
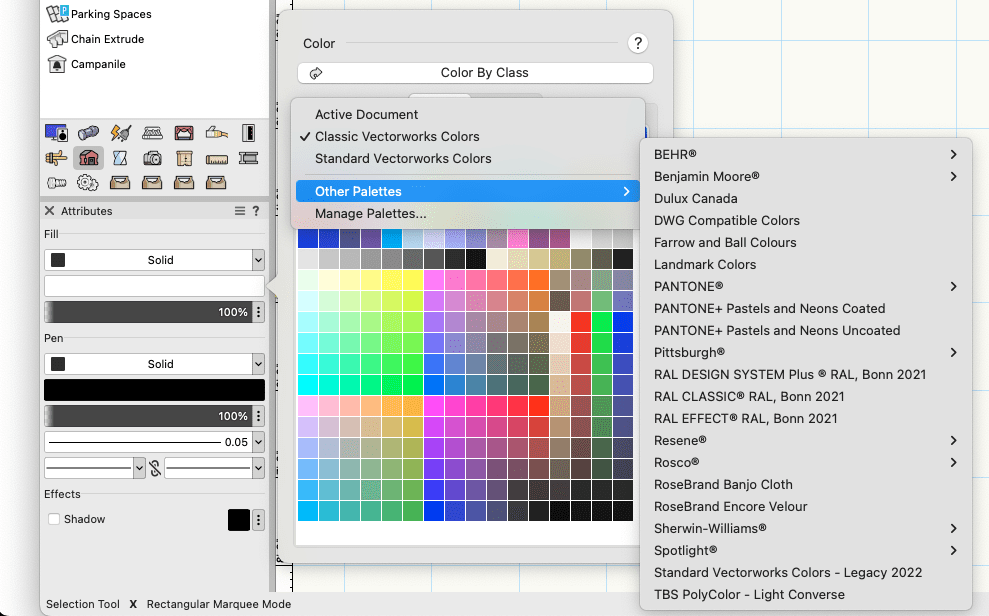
Adding Textures and Colors
Coloring and texturing your scenic design will bring it to life and is key for presenting your design to clients and colleagues. Vectorworks Spotlight has many options that will help you do this.
There's a large library of default textures that you can use to help detail your design. You can create custom textures in the Resource Manager.

A wide range of standard color palettes are included, such as lighting gels, Pantone, and paint manufacturer colors. You can add new palettes and customize existing ones as needed.
And, with the release of Vectorworks 2024 Update 1, NCS+ Pro, a powerful product by NCS Colour, is now integrated into Vectorworks. With an NCS subscription, the integration allows you to work digitally with color to identify, define, and visualize color choices.
Assembly
How you plan to build your design can have a huge impact on it. For example, is it going to use internal framing, will it be comprised of simple scenic flats, or can you use existing standard equipment to support it?
Modeling the underlying structure of your scenic elements will help you prepare construction diagrams for you and your colleagues to work from, enabling you to work out material requirements and related costs.
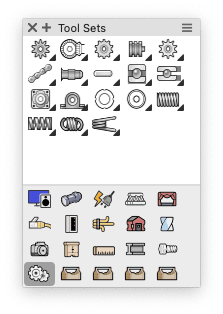
The Detailing, Fasteners, and Machine Design toolsets are great for adding construction-focused detailing to your design. However, you can model some of the construction details directly into your scenic and set elements. You can add them on separate design layers or referenced files to help keep your file organized.
For data, make sure to take advantage of custom data records. You can add records to the various elements in your design to document material type, costs, dimensions, suppliers, etc. This will aid your documentation process later in your project since all the important data will be directly in your file.
Rendering
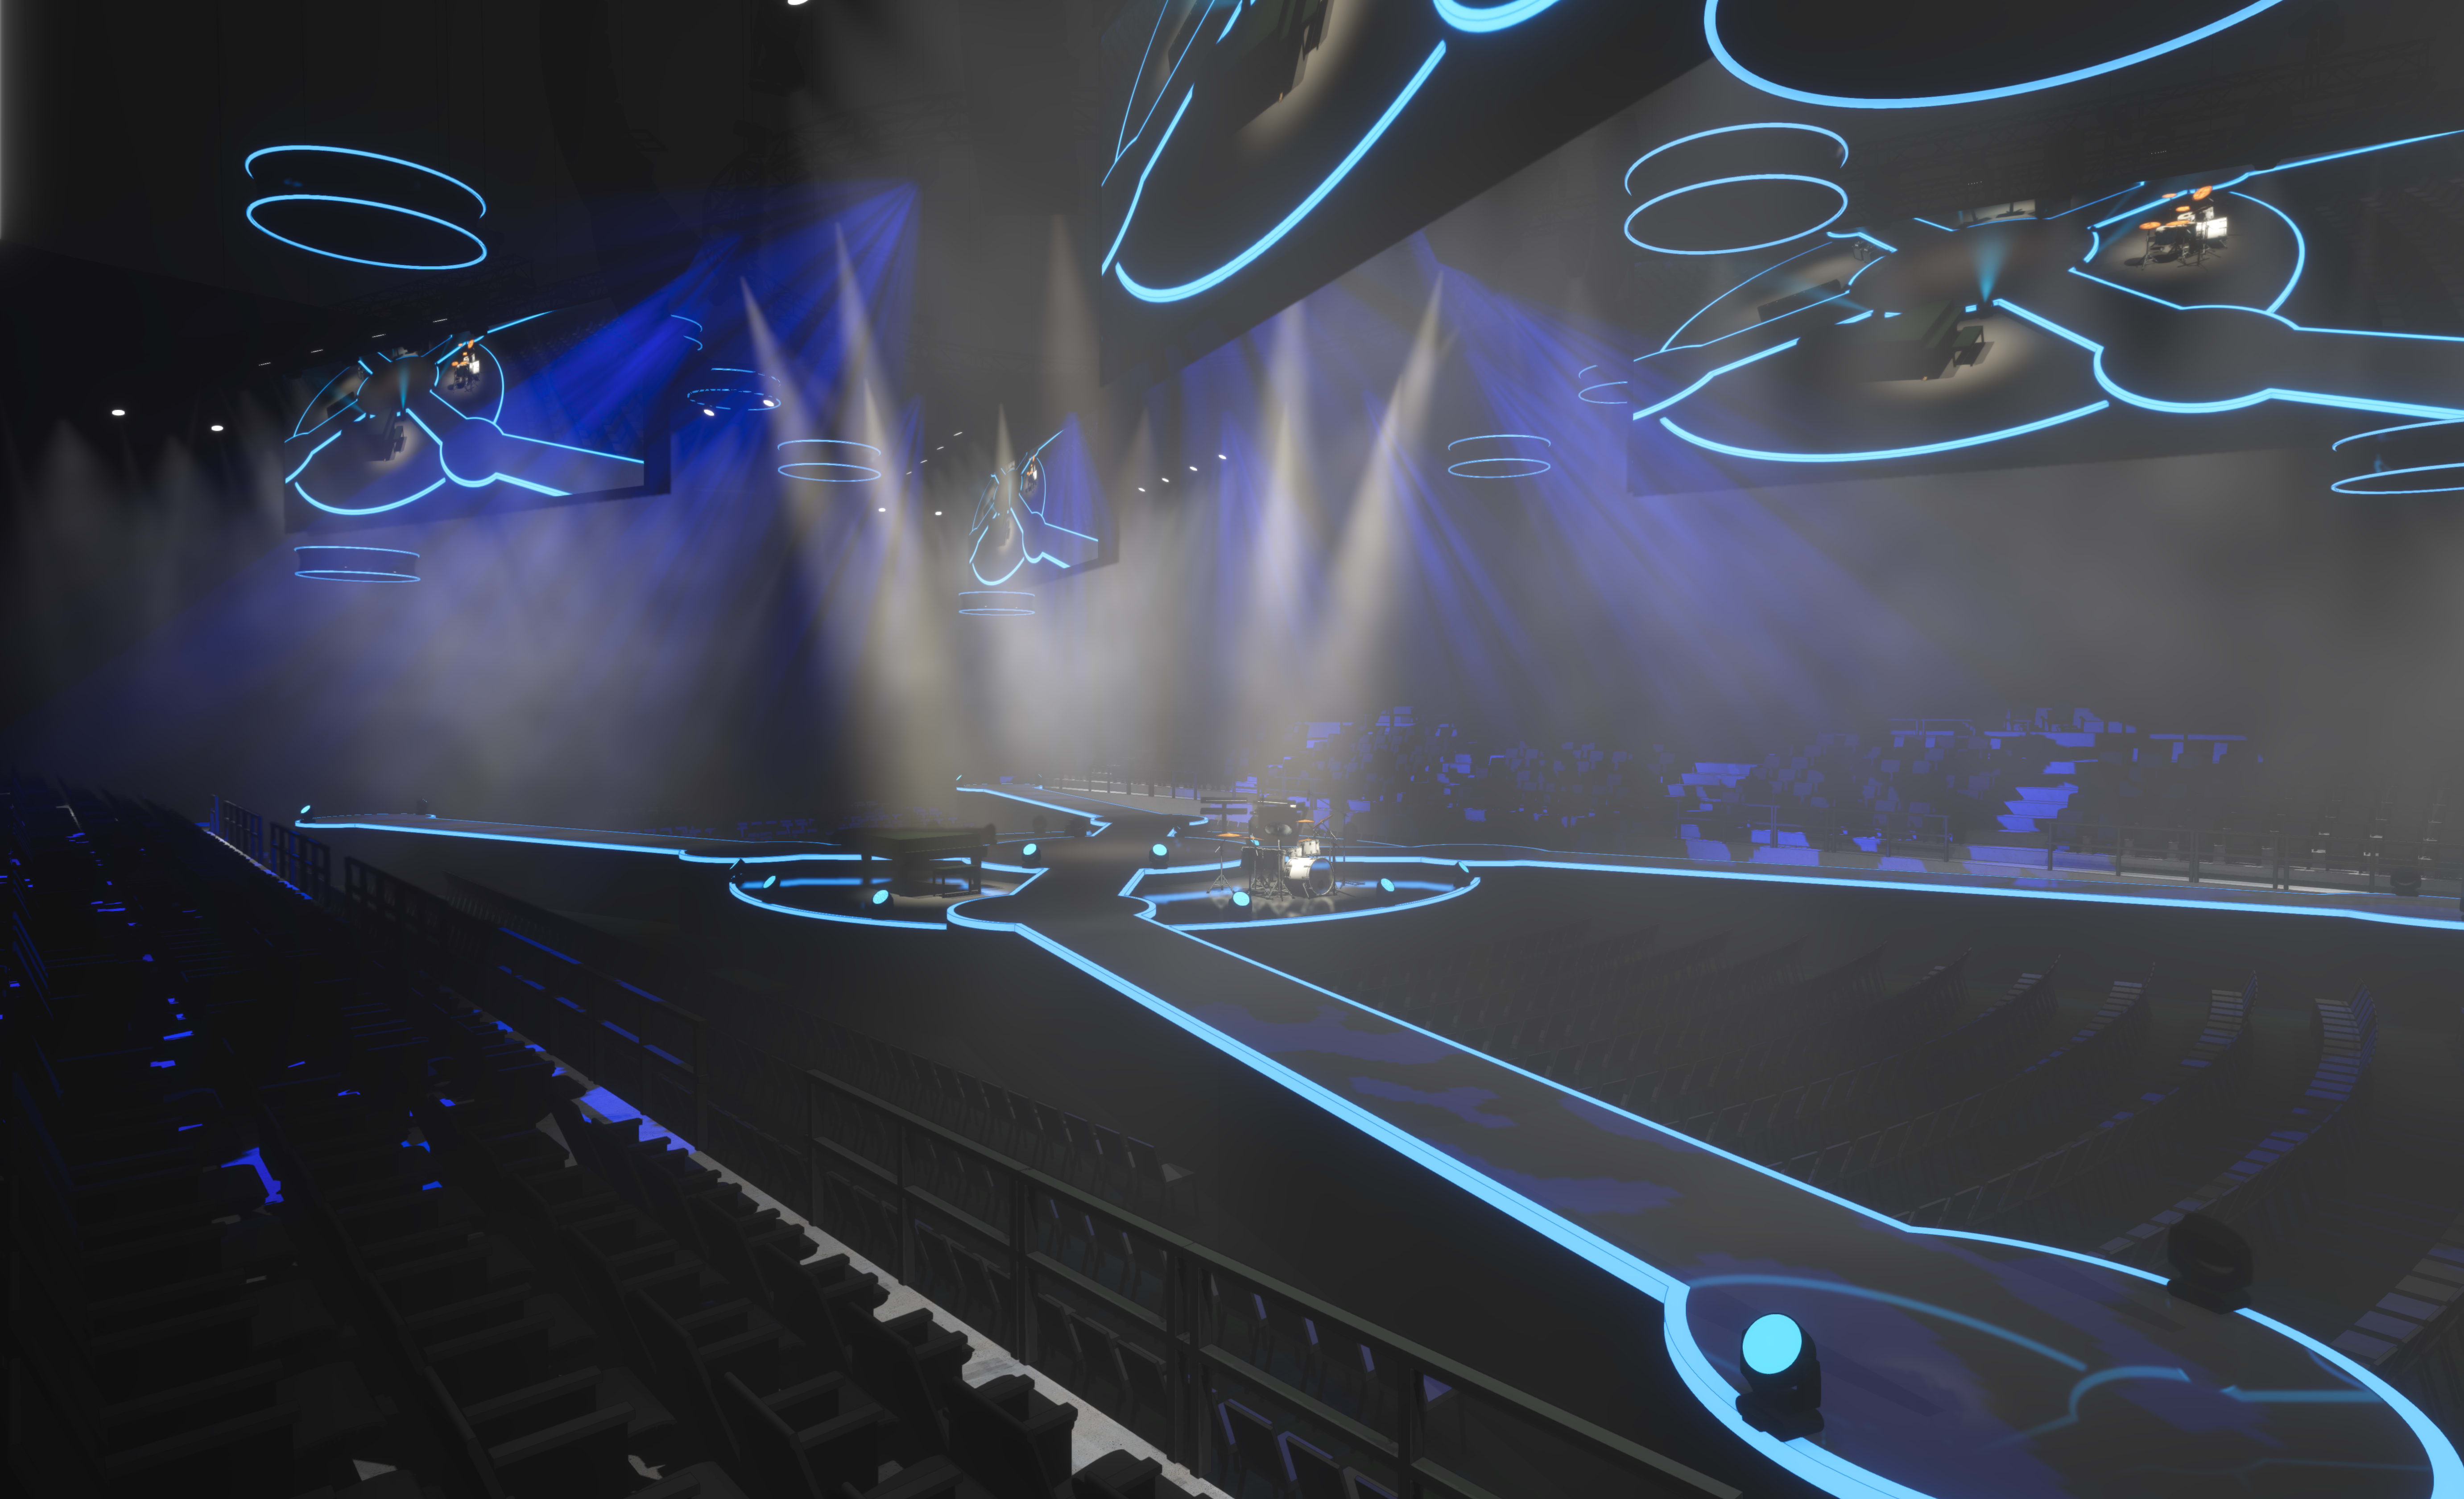
Presenting your design ideas to clients and colleagues is an important part of any set or scenic design process. Important to note is that this is part of your design and production process that won't have a fixed position in your workflow, as you'll likely need to go through this step multiple times at different points. It's also a key part of collaborating with your colleagues and clients during your scenic design and production process to show them your ideas and the results of reacting to feedback or changes as your project progresses.
What to Use
Vectorworks Spotlight includes a range of rendering options, so knowing which options to use for a particular task can save you a lot of time.
Shaded render mode, for starters, creates quality, detailed renderings with colors, shading, and textures. The Shaded render mode in Vectorworks also supports glow textures, lit fog, gobos, texture bump, environmental effects, and reflections.
And, Shaded render mode allows for unlimited lights in your scene, removing the previous eight-light limit. So, your 3D model will match what your production actually requires in terms of lighting.
Another rendering option is Renderworks, which is the standard built-in rendering engine capable of photorealistic rendering. This mode is based on Maxon's Cinema4D rendering technology and is CPU-based. You'll find Renderworks ideal for final quality and photorealistic rendering, but the higher the quality of the rendering settings, the longer the rendering will take.
With Vectorworks Spotlight, you’ll also have the option of using third party rendering integrations such as Enscape, Twinmotion, and Lumion.
Collaboration
Many set and scenic design projects will require you to work with a variety of project partners. These could be colleagues from other departments, such as lighting or video, or clients from whom you need to obtain feedback. Vectorworks Spotlight provides several options for collaboration.
Project Sharing
You and your colleagues can all work on the same project file. Your colleagues can check out specific parts of your master project file to work on and then push the changes into the master when they're finished. Depending on how you structure your master project file, Project Sharing can be a great way for your colleagues to look at your design and provide direct feedback and comments.

Cloud Services
The Vectorworks Cloud Services is an often underused tool for collaborating with clients and colleagues. There are several ways you can benefit by integrating it into your design and production processes:
- Collaborate on projects using Project Sharing.
- Share files directly with your colleagues, keeping everyone involved with the project up to date.
- Publish your set of drawings and share PDFs of your design layers that can receive comments.
- Cloud-based rendering allows you to continue working on your design while the rendering is taking place.
- Let your clients view your design from their desktop or mobile device without giving them your complete design file, helping you maintain control.
- The Cloud Services Nomad app will enable your clients and colleagues to access your design using augmented reality to get a far better idea of how your design will look and feel in the proposed space.
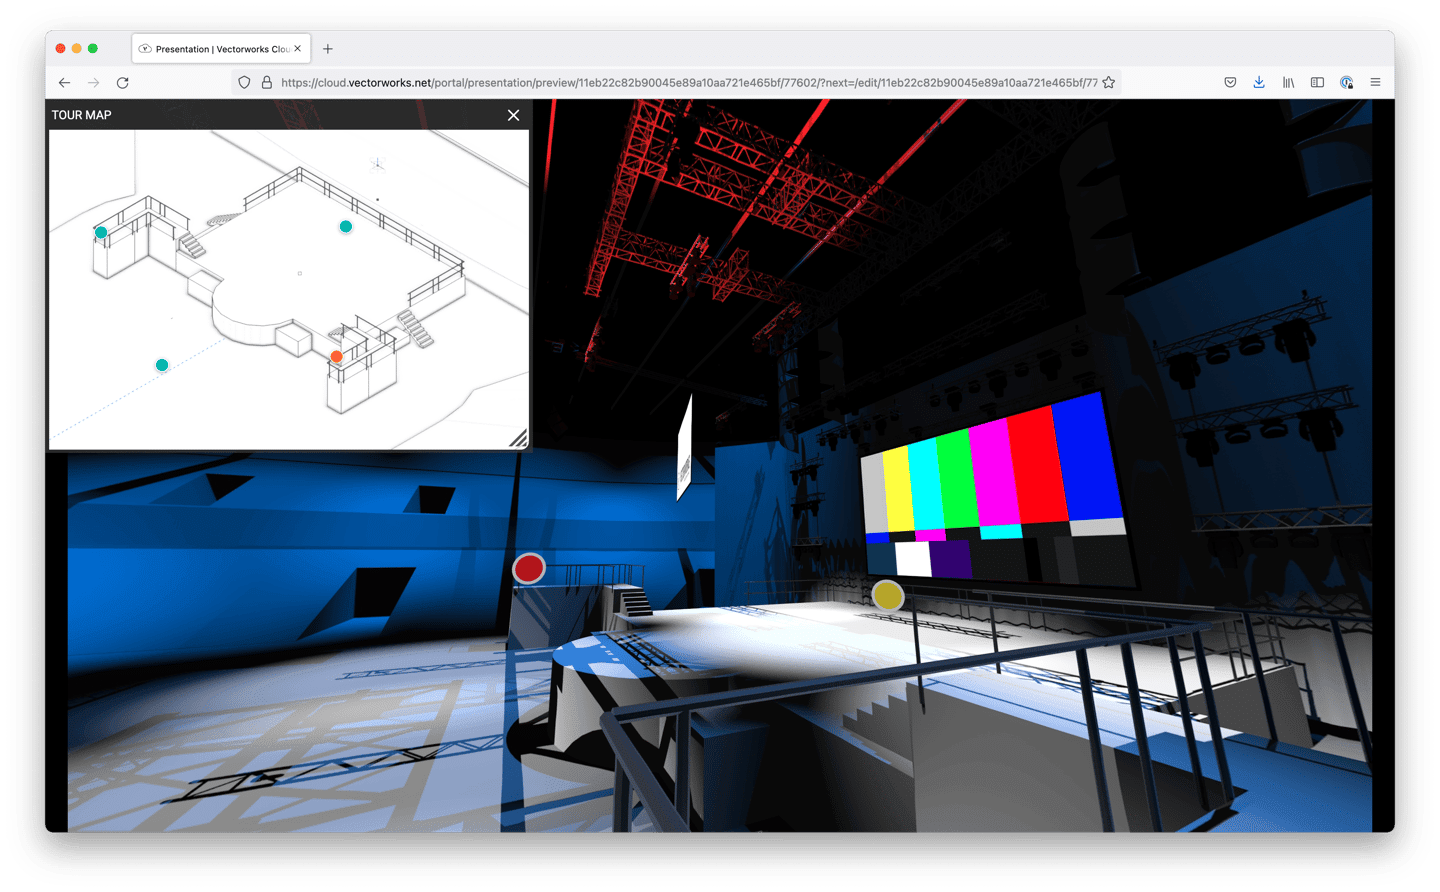
- Create and share presentations with boards and tours.
Documentation
The final step in any scenic design and production process is creating the construction plans that will be needed to build your design in the workshop and or on-site. Depending on the size of your project, you may be directly involved with the construction process. However, you still need to be able to communicate how to build your design to colleagues and on-site crew who will also be involved in the construction process.
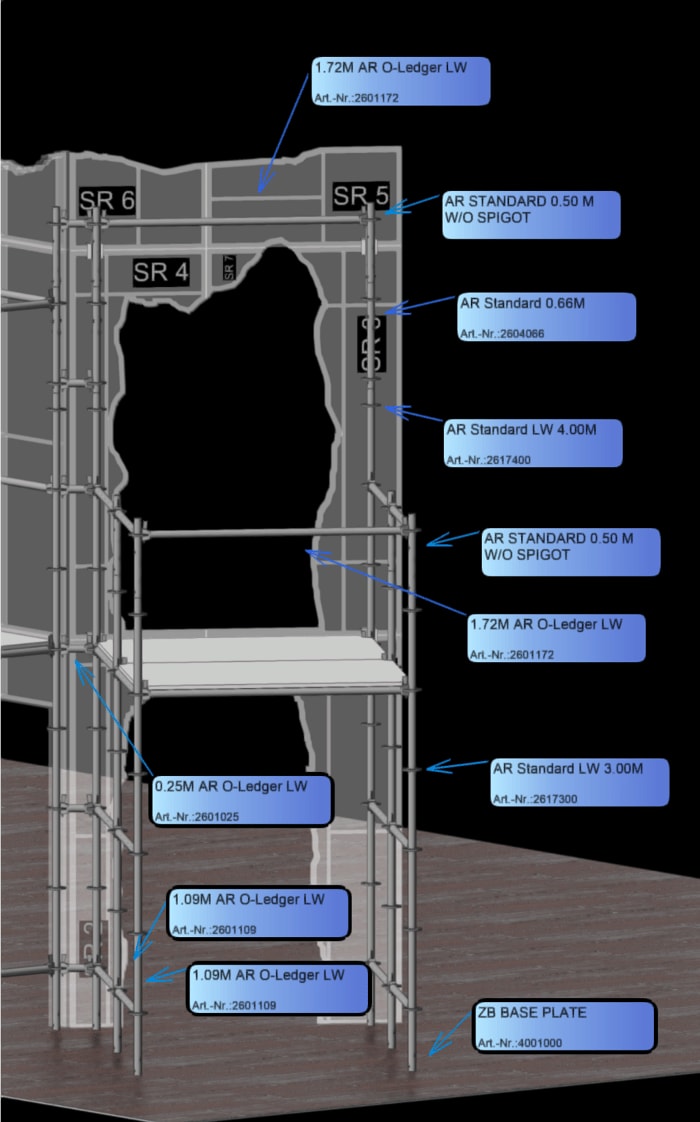
In most cases, your documentation should include more than just construction plans. For example, you can use live Data Visualization to highlight important details in your viewports without annotating your design or editing the design itself manually. This is especially powerful for marking equipment types like scaffold sections or different types of hardware.
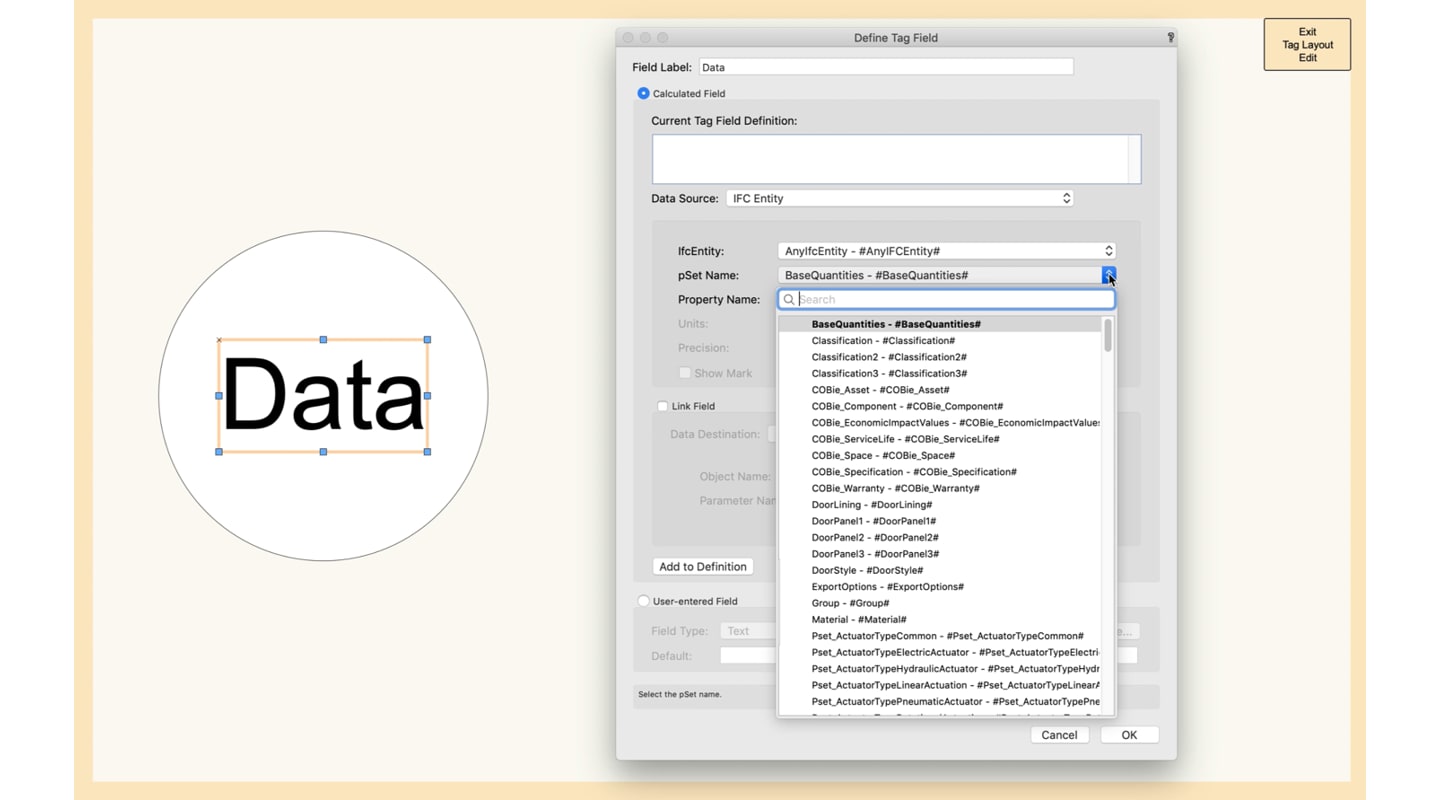
Additionally, Clip Cubes enable you to create angle or rotated section views quickly, and Data Tags help you display important information.
So, no matter what type of film, show, or event you are working on, making Vectorworks Spotlight the center of your scenic design and production process will enable you to develop a flexible and efficient workflow for delivering successful projects for your clients. Vectorworks Spotlight frees you from the burden of complicated technology to concentrate on what's most important — your design.
Continue Learning on Vectorworks University
If you want to learn more about leveraging Vectorworks for faster workflows and greater designs, check out Vectorworks University. Here, you can watch webinars, receive on-demand certifications, and more.
Stay in the know with the latest insights
Subscribers receive news, customer stories, success and learning tips, event information, and other important announcements form Vectorworks.
By submitting this form, you agree that Vectorworks, Inc. and its authorized partners may contact you in regards to news, offers, and the use of our software, services, and platforms. Learn more about our privacy practices and your data on our privacy page.*