.svg)


This blog is written by Gemma Da Silva, who is responsible for the Enscape Blog and is the content marketing lead at Chaos. For useful rendering tips, check out their video tutorials, the Enscape Knowledge Base for step-by-step how-to articles, and the Community Forum to connect with fellow Enscape and Vectorworks users.
. . .
Enscape for Vectorworks is now available on macOS, providing you with another way to view your projects as high-quality visualizations.
Here, we take a look at how to get started and explore some of the key features that make visualizing projects easy and enjoyable with Enscape for Mac.
HOW TO OPEN ENSCAPE IN VECTORWORKS FOR MAC
Enscape is a real-time rendering plugin that’s activated directly within Vectorworks. This means that after installation, you won’t find it among your other applications as it’s not a standalone piece of software.
To enable Enscape when opening Vectorworks the first time after installing the plugin, start Vectorworks with any model of your choice or even an empty scene. Go to Tools > Third-Party > Enscape > Add Enscape to your workspace.
Now you should see the Enscape icon in your Tool Sets palette. Selecting it will open the Enscape Tool Set, containing various icons to access and control further parts of the plugin, but for now we want to start the render window first.
To start Enscape with any given project open, click the Enscape icon towards the top of the toolbar in Vectorworks. If you’re not in a 3D view, you might see a message asking you to select a 3D view to start Enscape. In that case, just select “Normal Perspective” in the Viewport settings to get going.
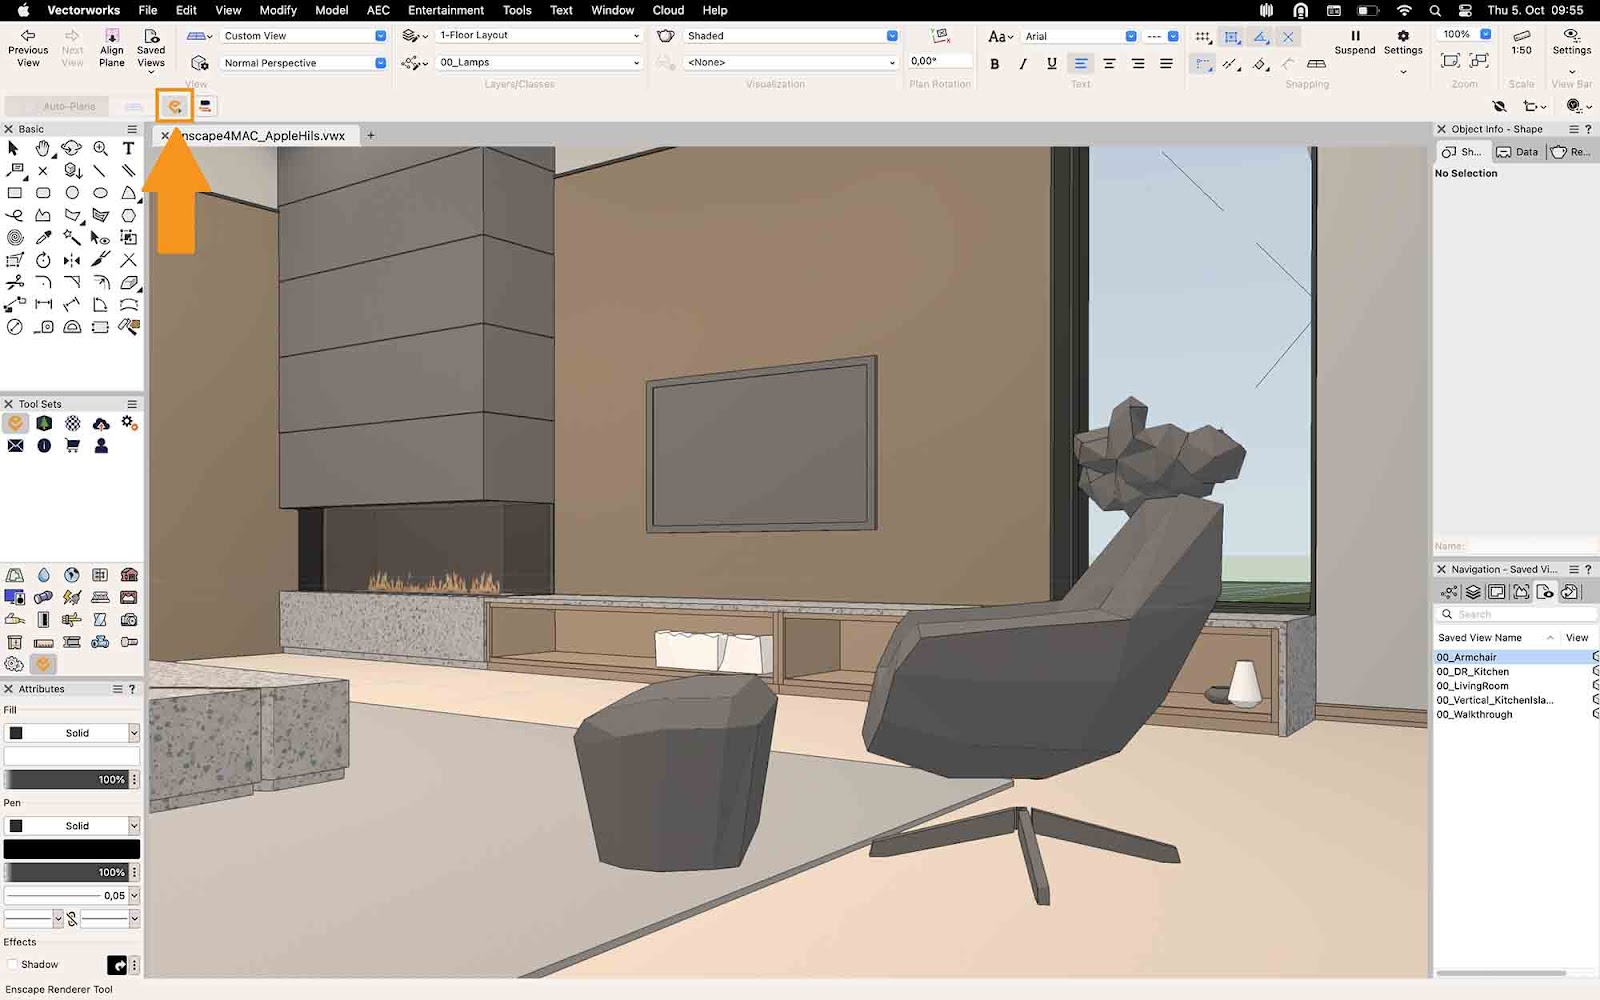
After selecting the Enscape logo in Tool Sets, clicking the Enscape icon at the top of the tool bar will start Enscape.
Navigating in enscape
After starting Enscape, a separate window opens to show an accurate representation of your design. To move around and explore your project, you can either use the WASD or the arrow keys.
- Forwards: Press W or the up arrow key
- Backwards: Press S or the down arrow key
- Left: Press A or the left arrow key
- Right: Press D or the right arrow key
- Look around: Left click, move the mouse while holding the left mouse button
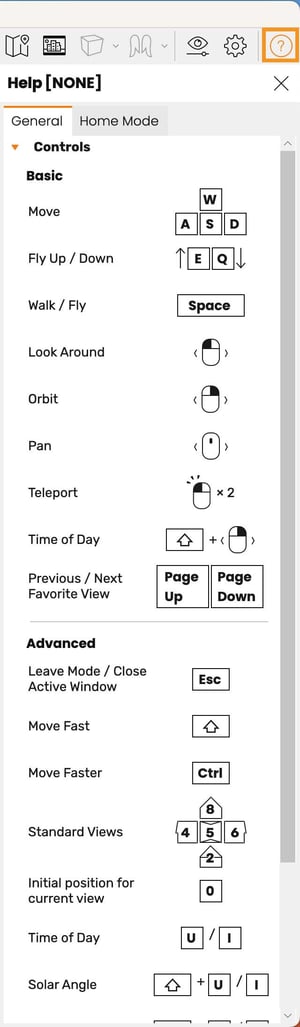
To access the help menu which displays all of these controls and many more, click the question mark icon in the top right corner of the Enscape window.
Synchronized and saved views
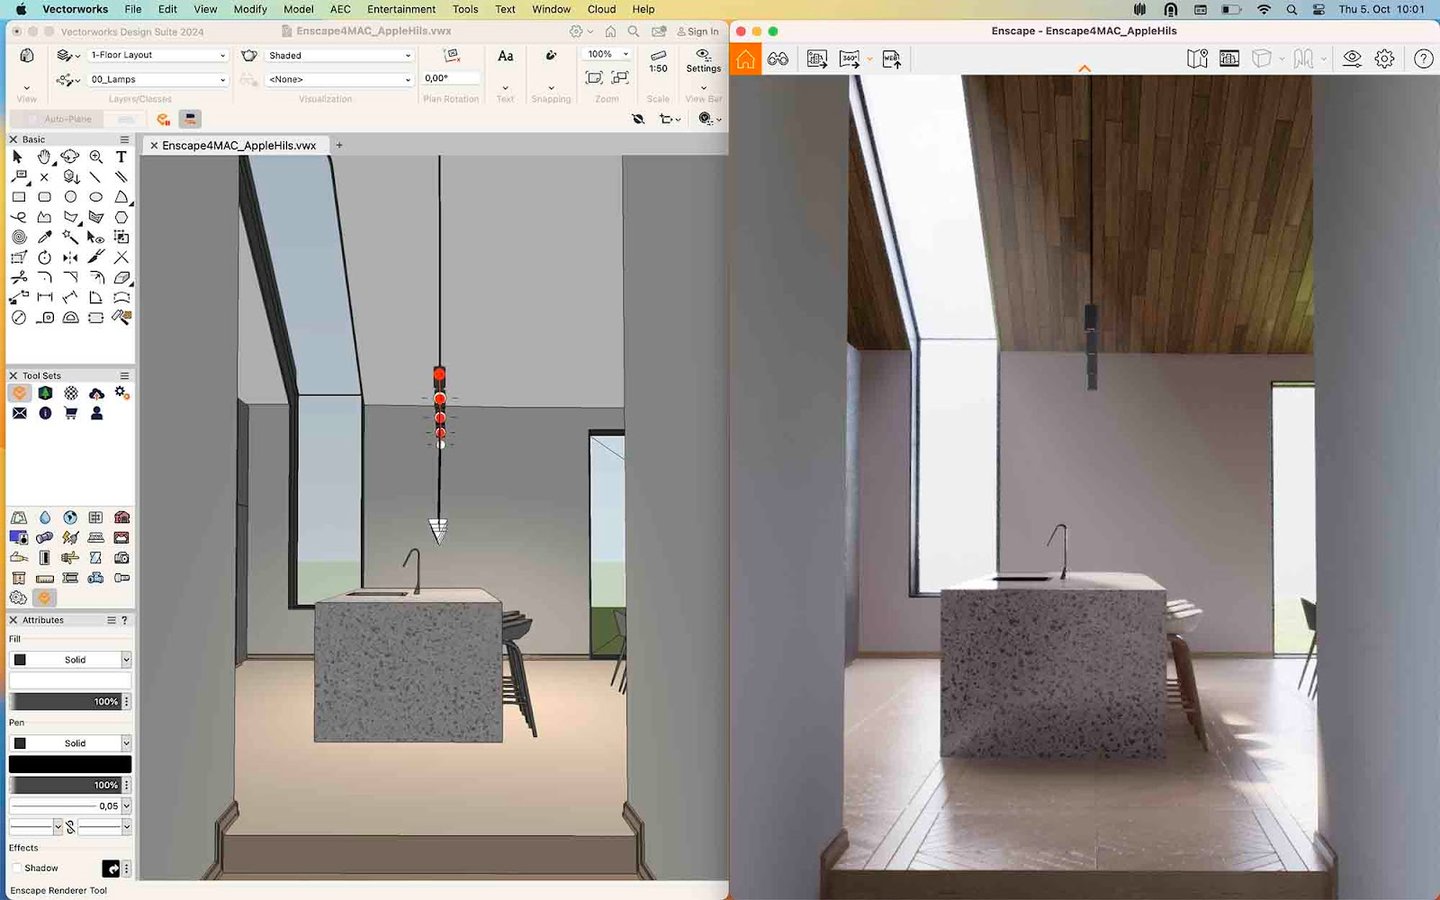
As Enscape is a plugin that’s integrated directly into Vectorworks, it’s always possible to visualize your rendered project in real time.
With the help of two features, Synchronized Views and Saved Views, you can quickly view your project as you design and prepare presentations.
By enabling Synchronize Views, as you navigate Vectorworks, Enscape will follow and show you the same view. This is ideal for quickly seeing how changes to the model will look and affect a project in reality.
The Snychronized Views icon.
With any Saved Views that you have set up in Vectorworks, these can also be visualized immediately in Enscape, which is particularly handy for when you need to present your ideas.
In the Enscape window, click the button with the binocular icon in the toolbar at the top. This opens up Enscape View Management. Clicking any of these views will move the Enscape camera to the correct position and even update the time of day and visibility settings based on what has been set for that particular saved view. This helps to significantly speed up the amount of time it takes to prepare a presentation.
3D MODELS IN THE ENSCAPE ASSET LIBRARY
Below the Enscape Renderer Tool Sets button, you can find the Asset Library.
This button opens a window that gives you access to thousands of optimized, high-quality 3D models that you can place in your scene to quickly add detail for a lifelike presentation.
To place assets, select one, left-click it twice, and then left-click twice in your Vectorworks scene where you’d like to place it. For easy navigation in the Enscape library, use the search function, categories, or tags to narrow down your search.
Enscape Assets will be represented in your Vectorworks scene with a low-detail placeholder but will show up in high detail in the Enscape window. Furthermore, using the placeholders in your Vectorworks scene, you can move Enscape assets, rotate them, or hide the design layer they’re stored on.
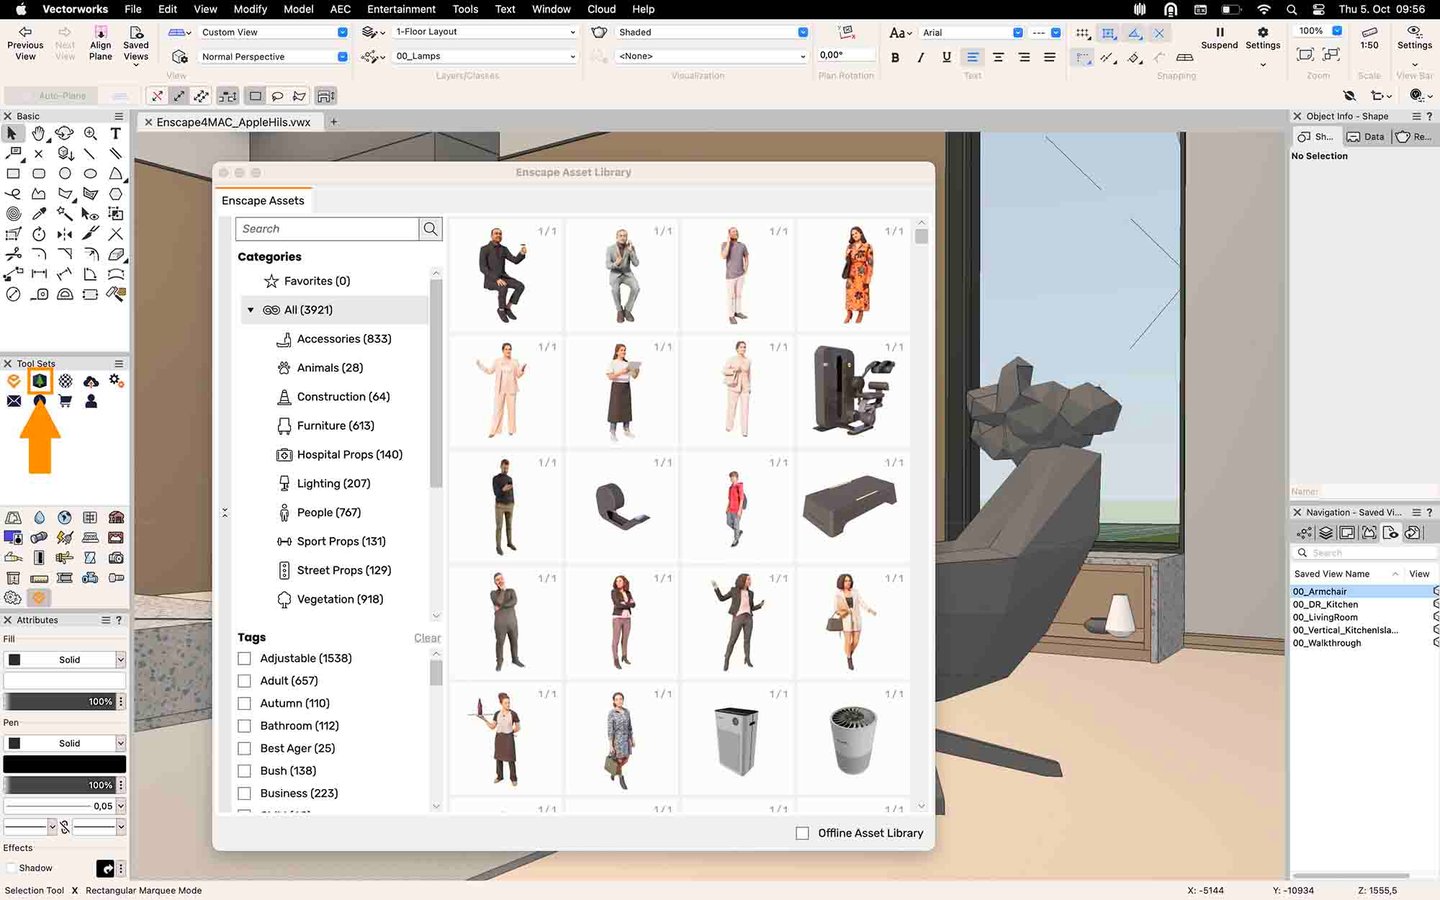
The Enscape Asset Library.
THE ENSCAPE MATERIAL EDITOR
Below the Asset Library button in the Enscape Tool Set is where you can find the Enscape Material Editor. This is one of the most important parts of the user interface.
This is where you can edit and enhance your existing Vectorworks materials (or textures, as they are referred to in Vectorworks) for improved realism.
If you want to create a new texture and apply it to a part of your design, you still do that in Vectorworks. Having the Enscape Material Editor open, you will find a list of all of the textures in Vectorworks. They will appear as materials in the Enscape Material Editor, and changing anything about them in one tool will also change it in the other.
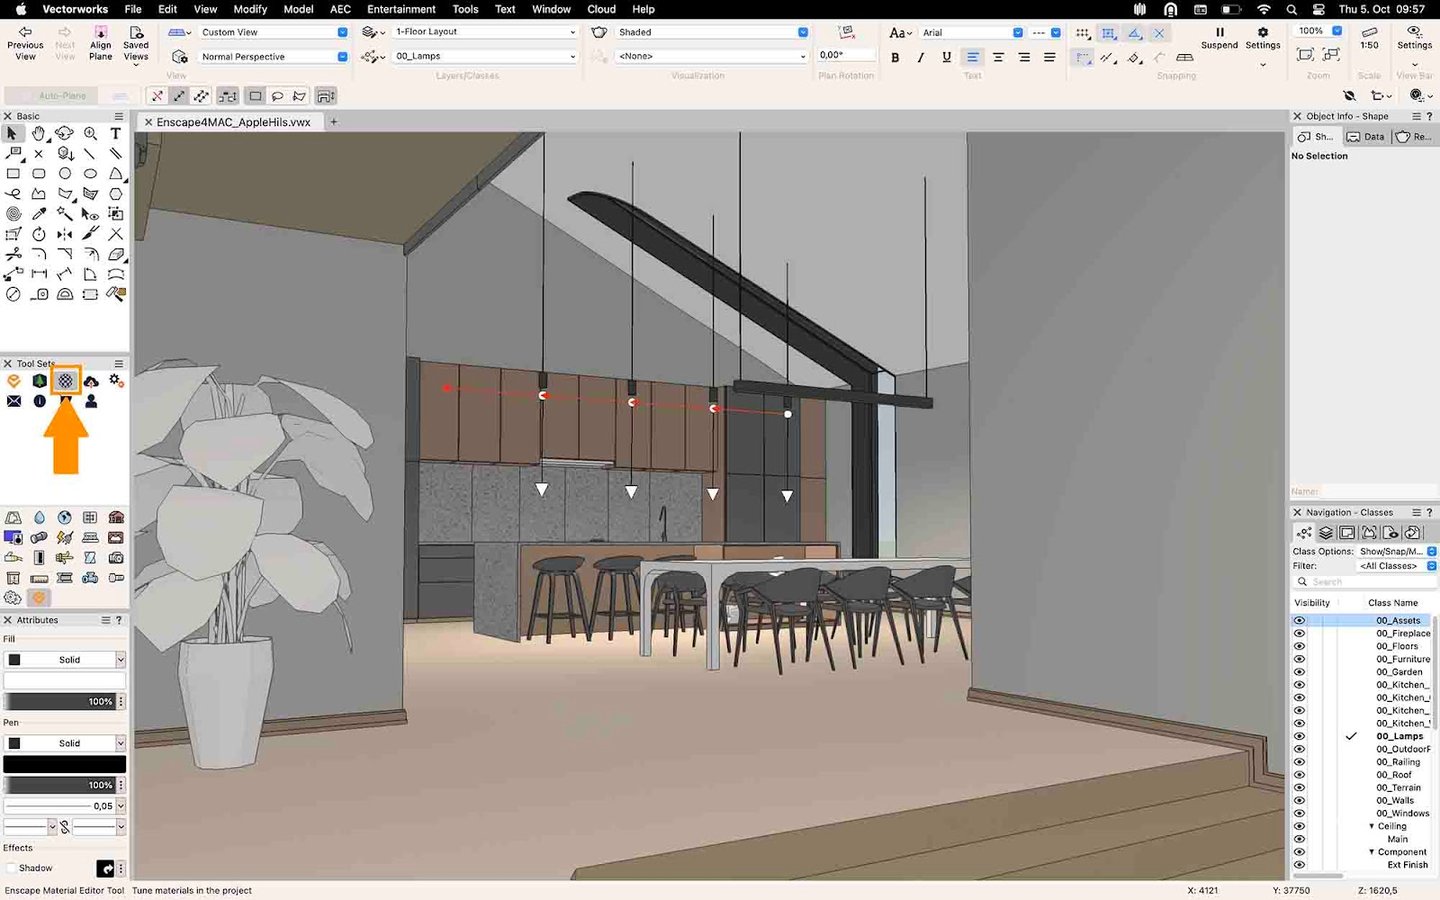
The Enscape Material Editor icon.
Editing Materials
When editing materials in Enscape, you can change the base attributes like color, roughness or reflections, metallic value, or transparency. However, it gets particularly interesting when you involve image files, called textures, to control some of these attributes.
You can use the existing color textures you already have in Vectorworks. There are also plenty of online resources where you can download high-quality free 3D textures, such as ambientcg.com.
Download a material (we recommend downloading it in 2K resolution). Once downloaded, open the folder you've received and save the image files on your Mac. Go back to the Enscape Material Editor to import the files.
EXPORTING ENSCAPE VISUALIZATIONS
Currently in Enscape for Mac, it’s possible to export and share your scene as a still image rendering, a 360-degree panorama, or a web standalone file.
Still Image Renders
Before exporting a still image, you may first want to change the resolution. Go to Visual Settings (found in the top right corner of the Enscape window). The Output tab is where you can change the resolution and the image file format.
You may also wish to change the time of day (shift + right mouse button), and enable Safe Frame, so you can see exactly which parts of your scene will be rendered. When ready, click the Screenshot button which is located on the Enscape toolbar at the top left of the rendering window. Your image will be created in just a few seconds.
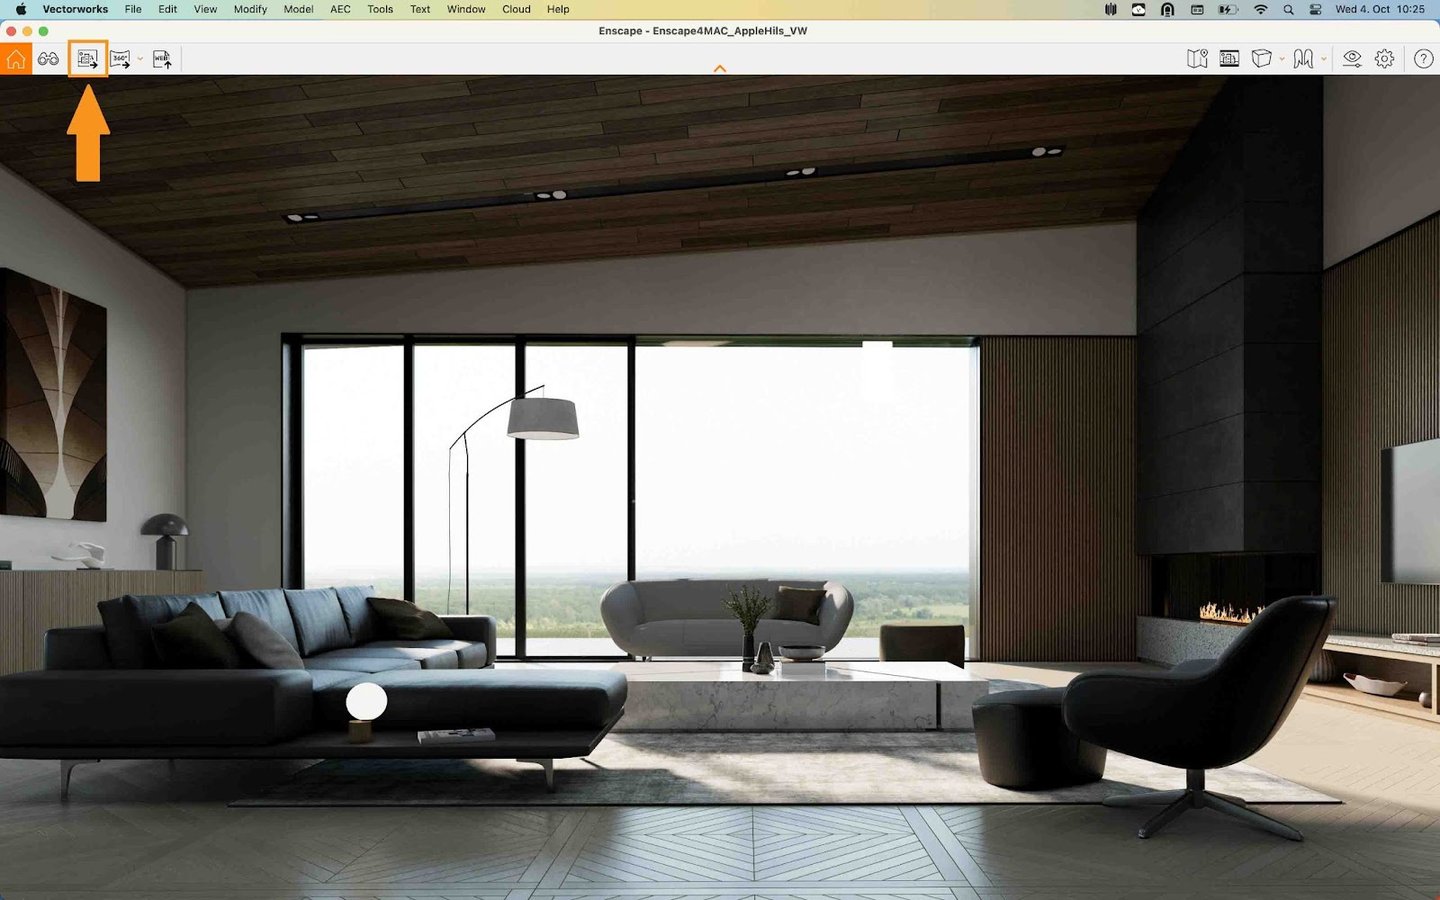
Click the Screenshot button to render an image in seconds.
360-Degree Panoramas
If you wish to export a panorama, select the Mono Panorama button, and Enscape will create a 360-degree panorama from your current position.
Once created, the panorama can be found in the Upload Management area in the Enscape Tool Set in Vectorworks. From here you can save the panorama as an image file, but you can also share it via the Vectorworks or Enscape clouds.
This provides you with a shareable web browser link and a QR code, both of which provide immediate access to the panorama.

Click the 360 button to render a panorama.
Web Standalone
By clicking the Web Standalone export button in the Enscape rendering window, you can export your entire project to the web. This allows anyone the ability to navigate and explore your project, even if they don’t have Enscape or your design software installed.
Once exported, you can find the standalone file in the Upload Management window, in the Web Standalones tab.
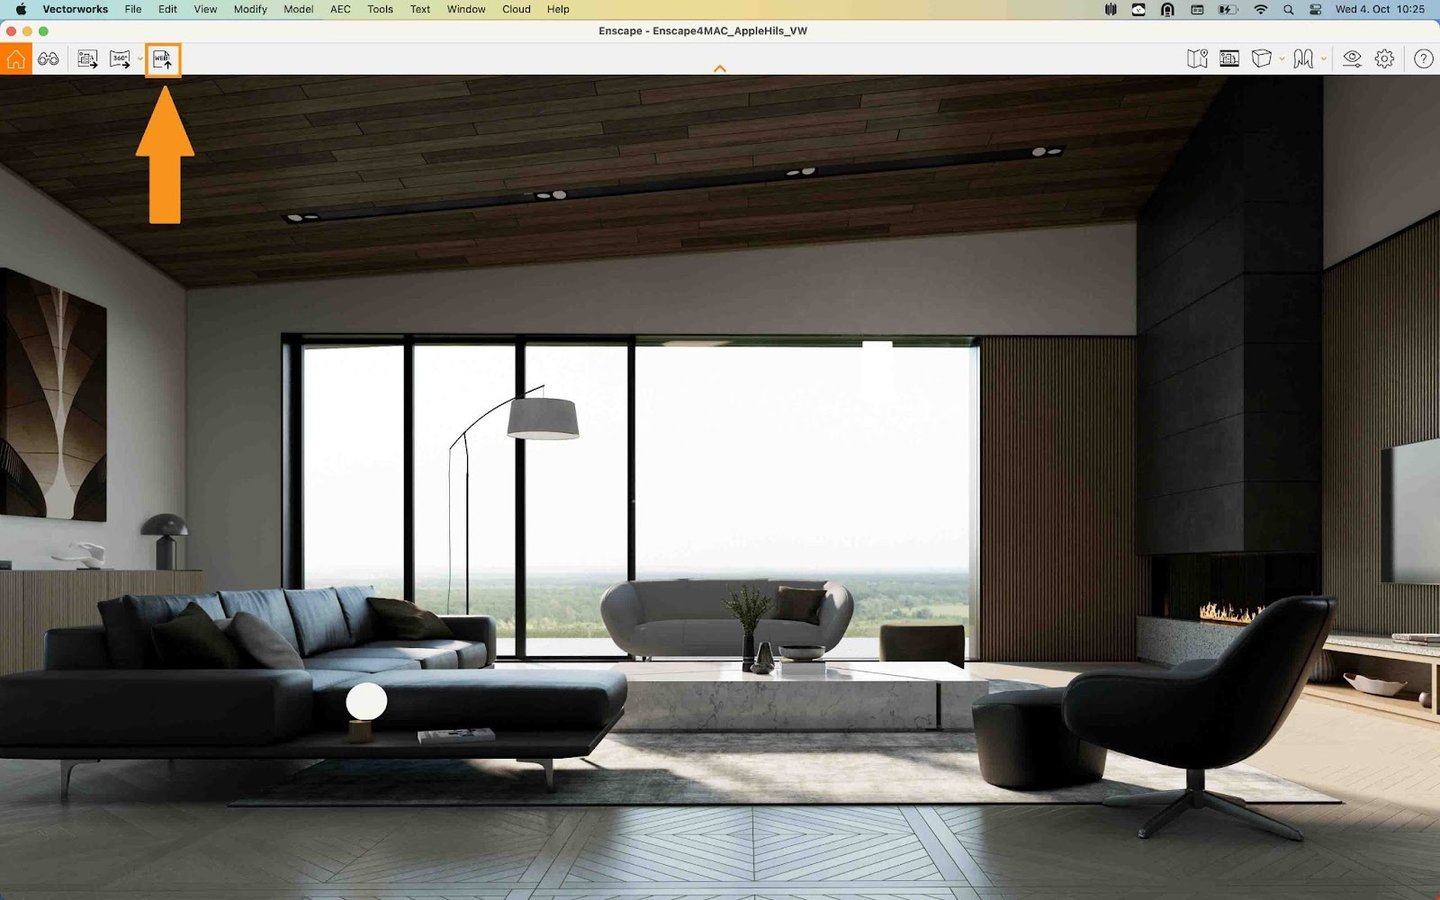
Click the Web button to export a web-based version of your rendered project.
GET STARTED WITH ENSCAPE FOR MAC AND VECTORWORKS
If you’re new to Enscape, download a free trial to see how it can help accelerate and improve various aspects of your design workflow.
Existing customers can download the new Enscape for Mac for Vectorworks here.
*All images courtesy of Enscape.
