.svg)
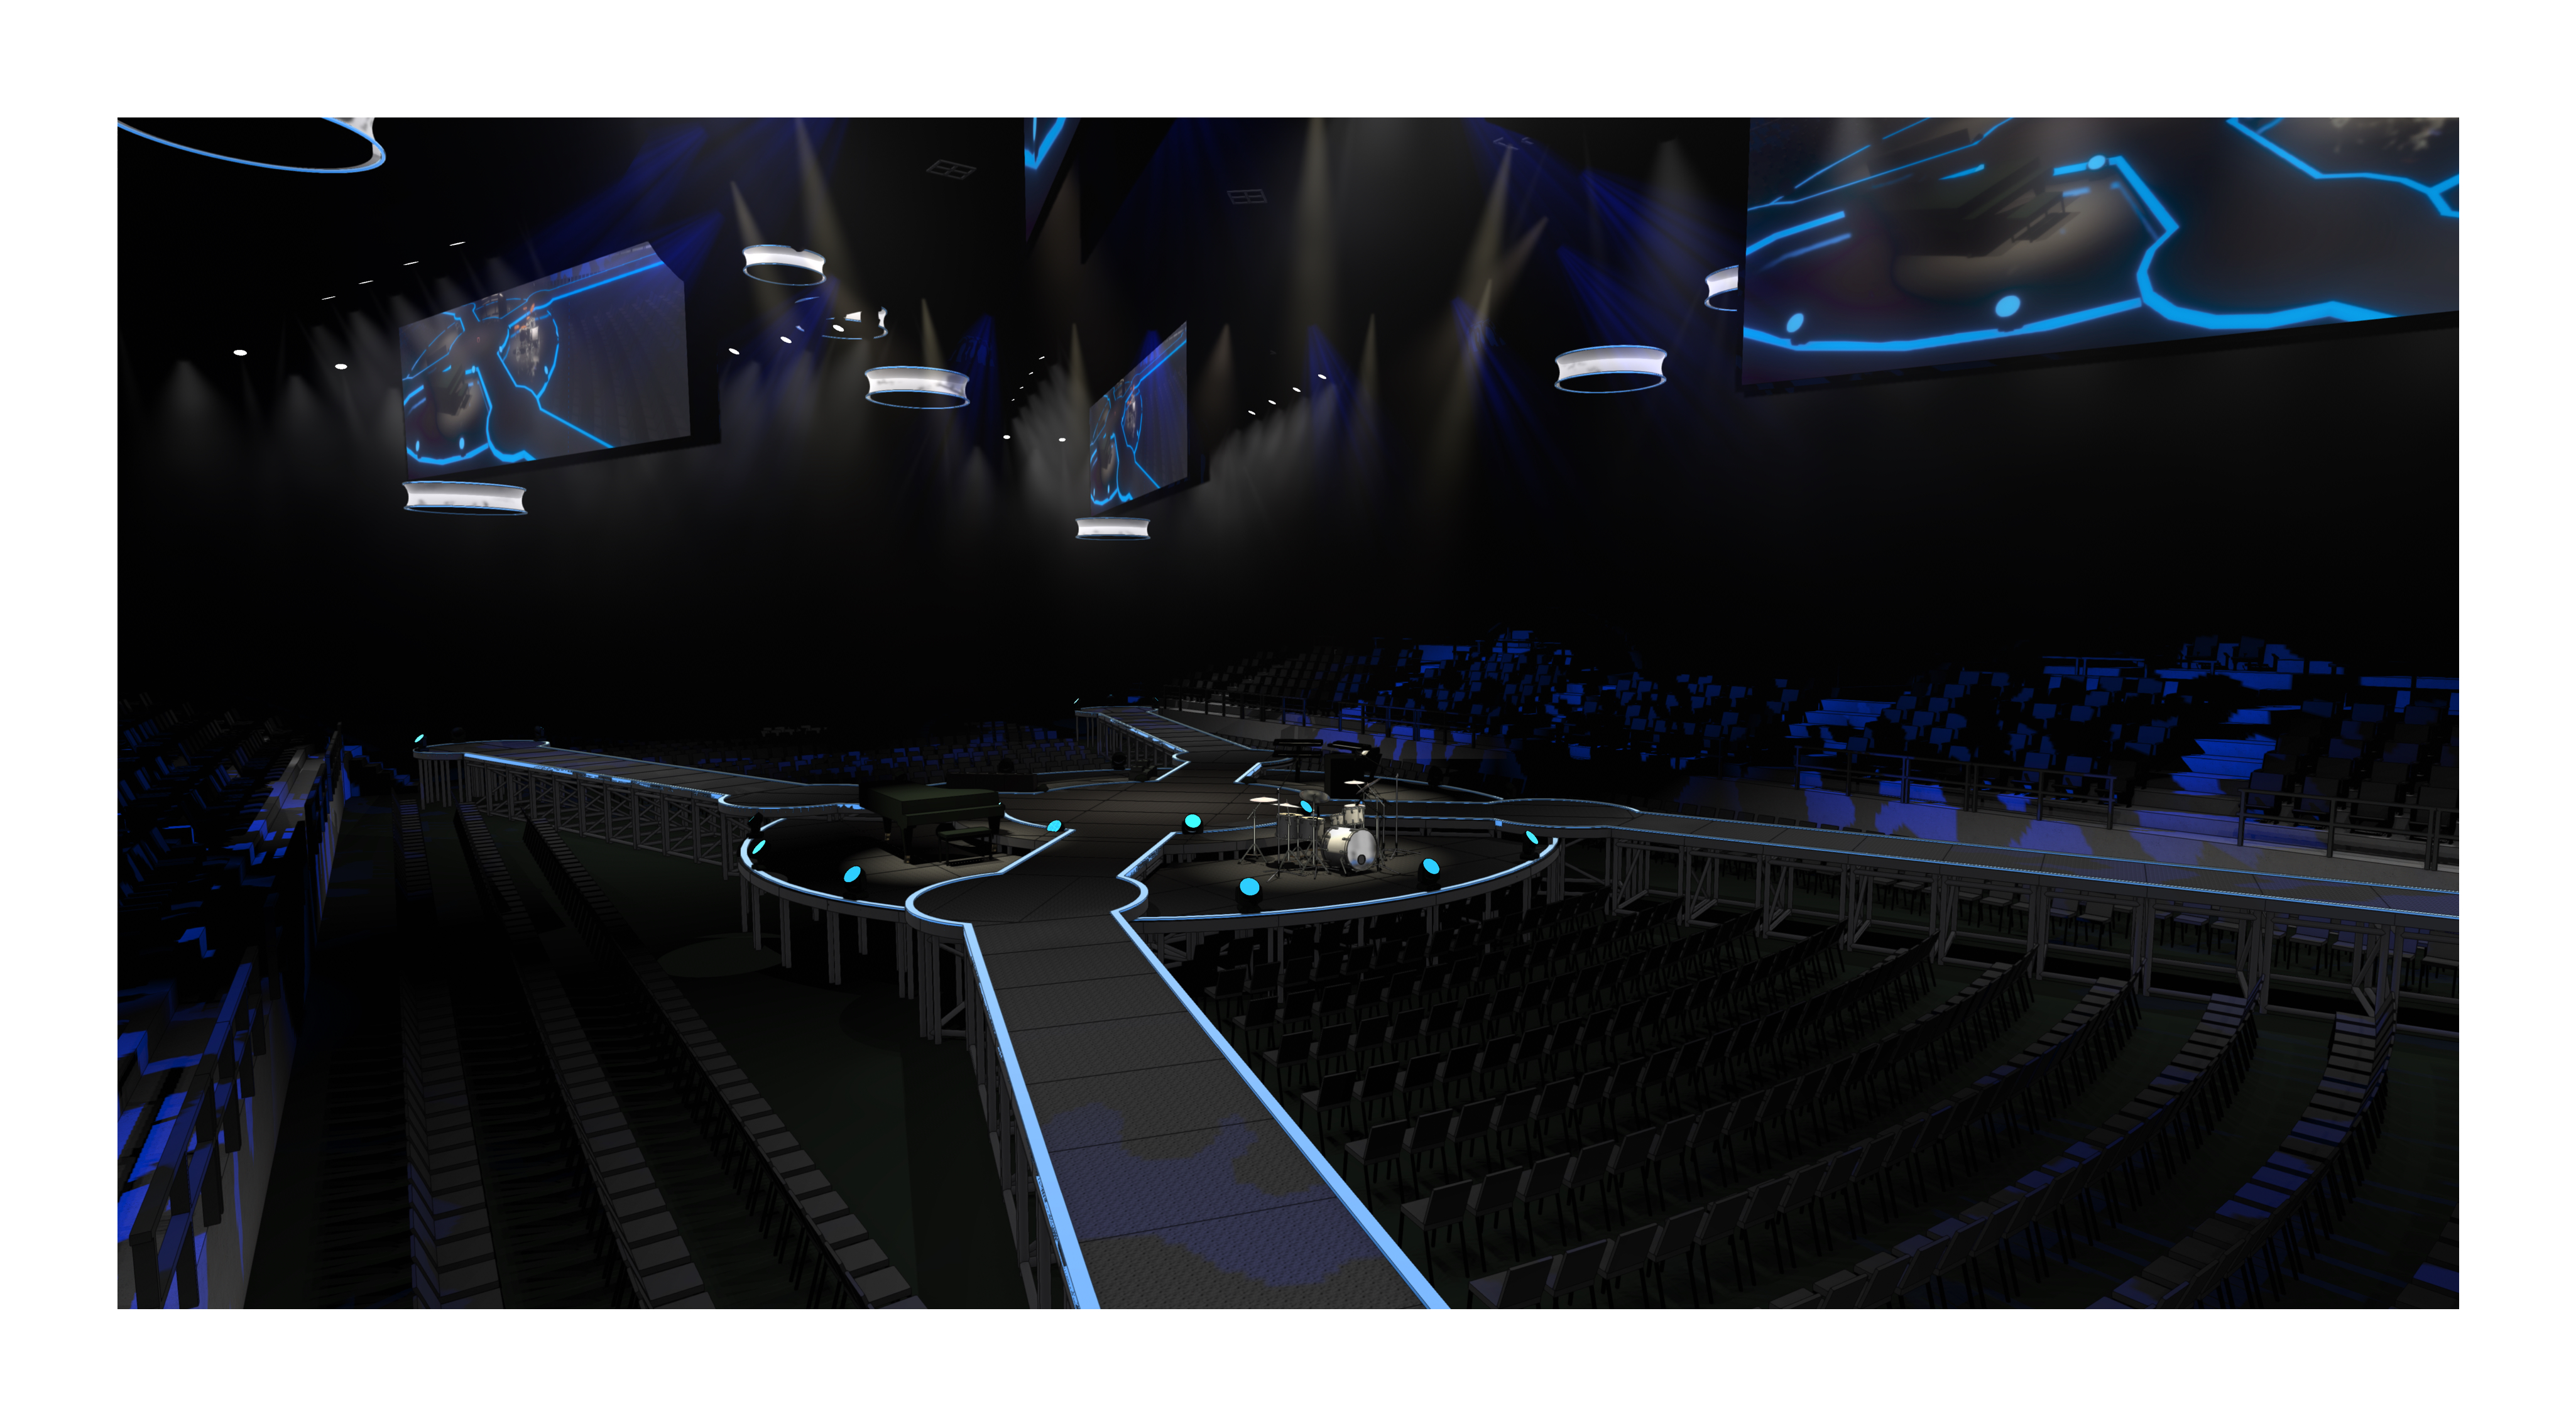


With improvements to the Shaded rendering mode in Vectorworks Spotlight, you can create higher levels of realism in earlier stages of your design process.
This post will explore these improvements, specifically the three new tabs found in the Shaded Options dialog: General, Camera, and Quality. Through a combination of these tabs (plus the removal of an eight-light shadow limit), you can create realistic renders in real time directly within your model.
3 Tabs to Control Your Shaded Renders
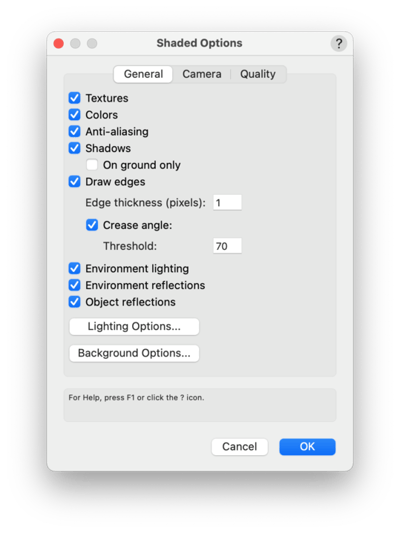
General
The General tab includes controls for the visibility of textures, colors, shadows, and edges, while the anti-aliasing option controls the pixelation of your visualization.
You’ll also find all of the lighting options in the General tab, such as environmental lighting, reflections, and object reflections. These options give you an efficient, direct way to access your lighting and background options.
Camera
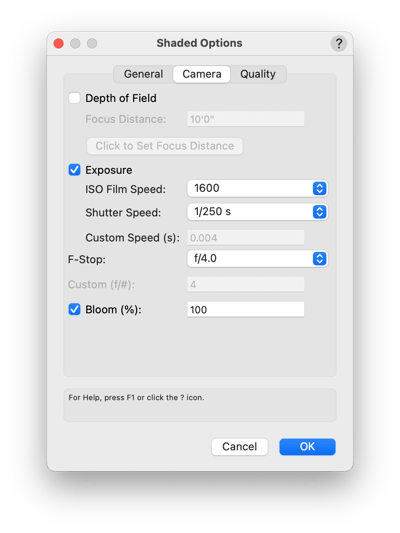
With the Camera tab, you can choose to add various camera effects to your rendering, enhancing your Shaded views.
These effects work just like a traditional camera, but if you don’t have any previous photography experience, here’s a quick rundown:
Depth of Field changes the focal point of what you are looking at. For example, when you are working on your computer, and the screen is clear, but your peripheral vision is not, that is an example of Depth of Field.
Changing the aperture (F-Stop) changes how sensitive the Depth of Field is. If you have a high F-Stop, you'll have the whole image in focus. A lower F-Stop will be more sensitive to the Depth of Field. Changing the F-Stop also changes how open the lens of the camera is. High F-Stop will lead to a darker image.
ISO is light sensitivity. The lower the ISO, the less "noise" will be in the image, but the image will be darker. You can have a very high ISO speed, like 3200, but the image will become less crisp.
Shutter Speed is how long the "film" is exposed for. A faster shutter speed will be great for capturing a race car, but it makes for a darker image. A long shutter speed will make a lighter image, but it will be blurry if something in the image is moving.
These settings go hand-in-hand to help you create the precise views and representations of your designs you want.
Check out how you can manipulate the different settings together below:
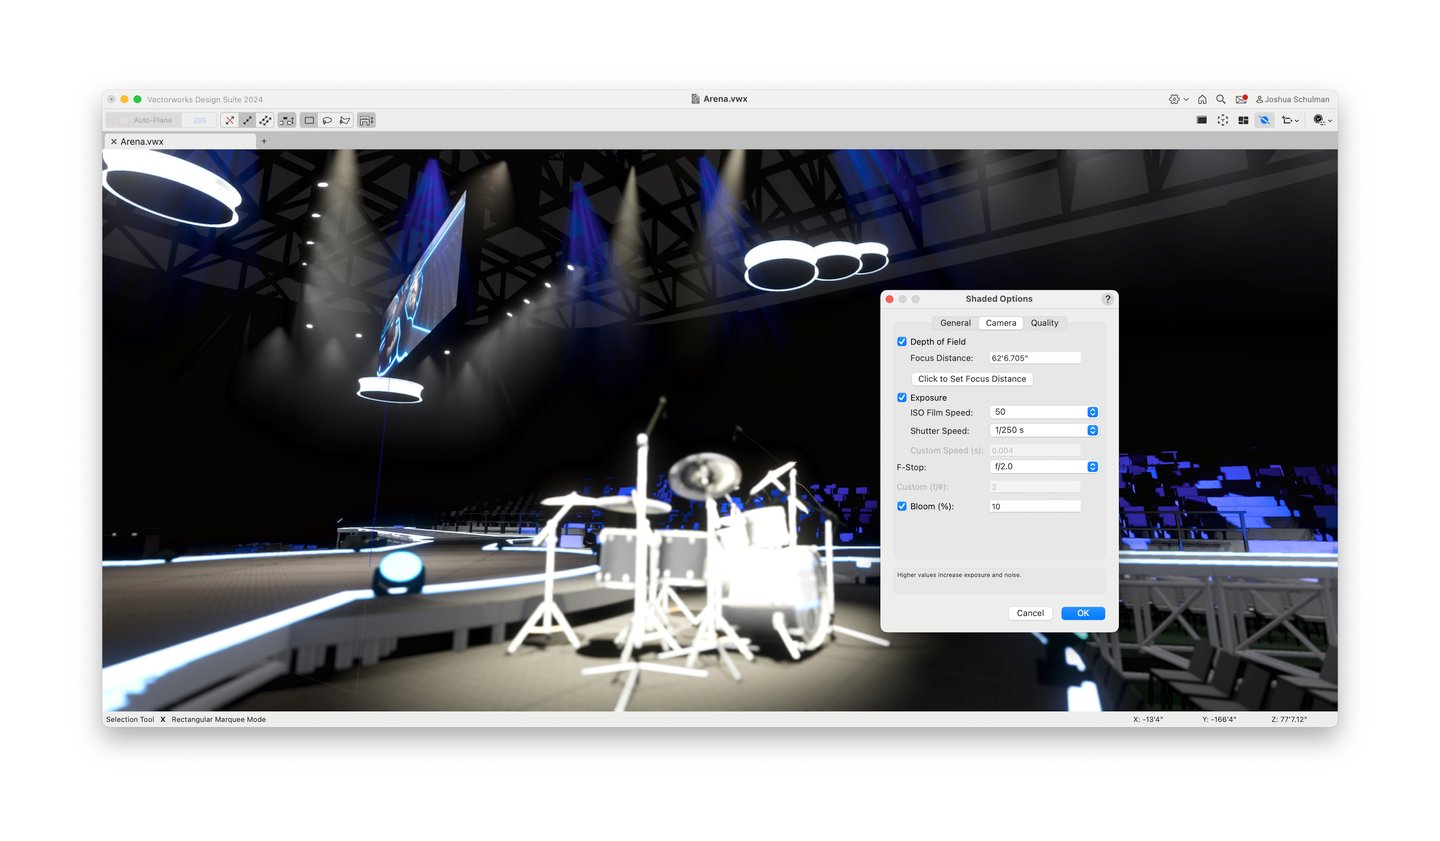
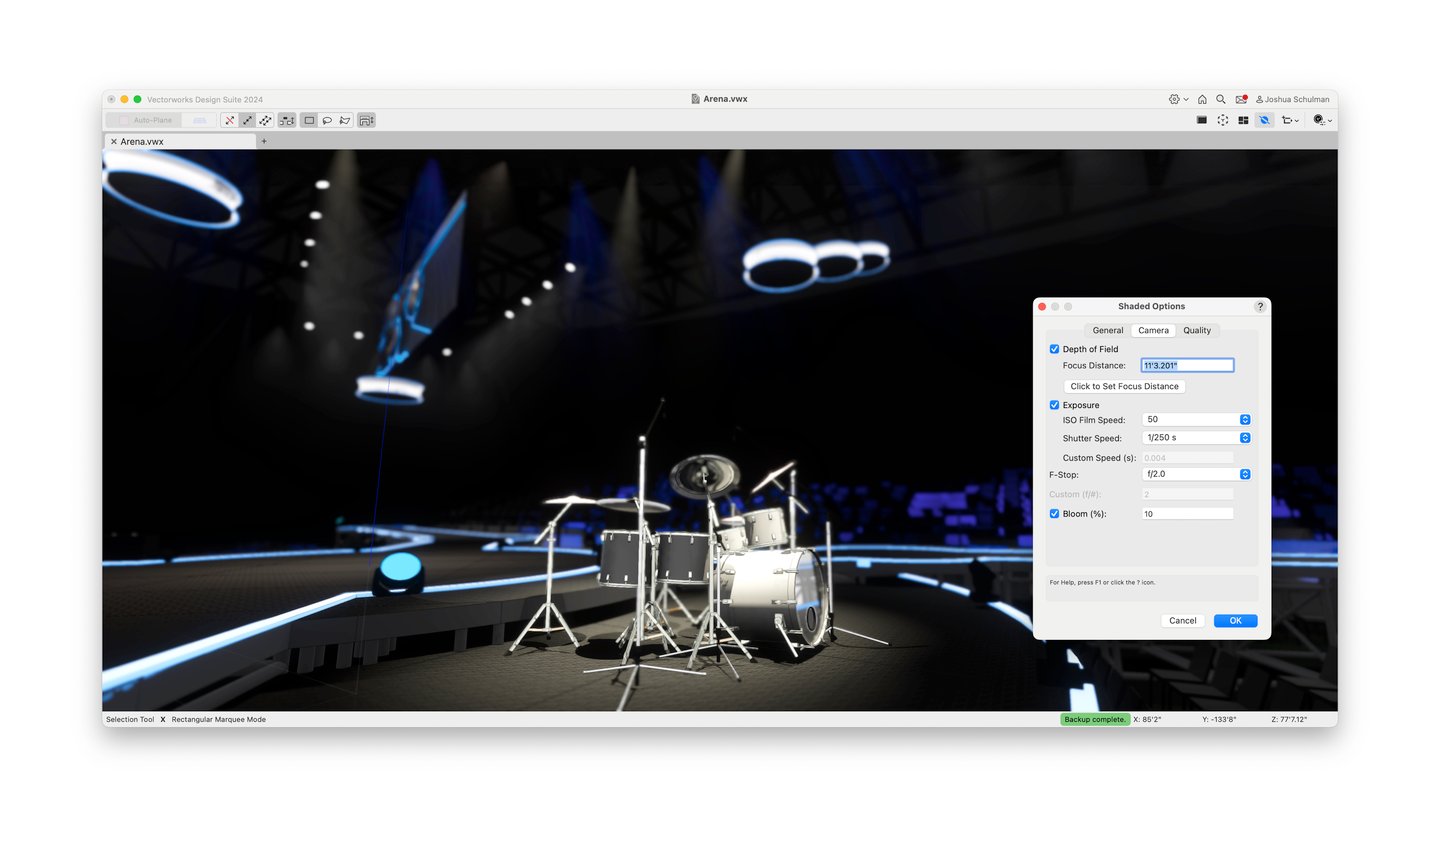
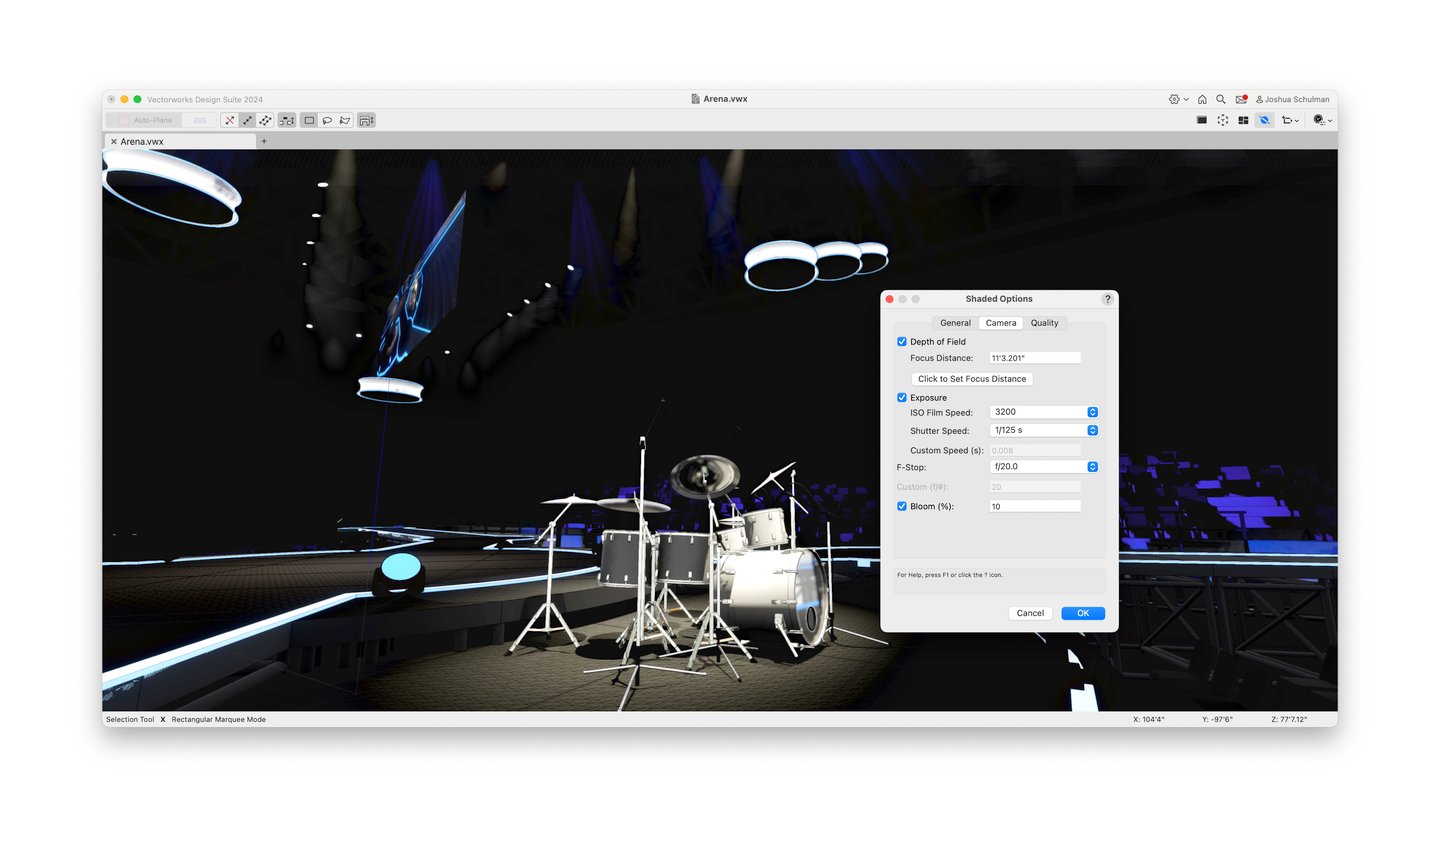
Bloom can also be a helpful tool in your Shaded render toolkit, adding a glowing halo effect to lights you’ve placed in your set, stage, or live event design.
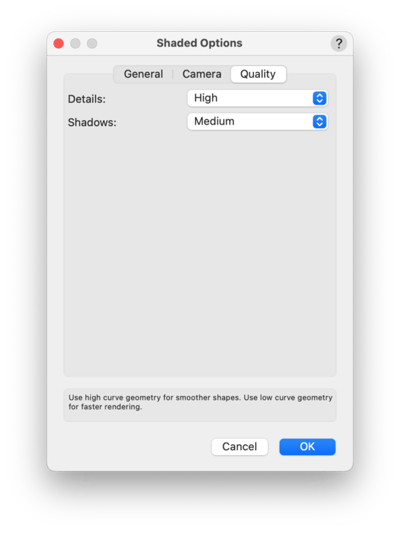
Quality
The third and final tab of your Shaded render dialog is Quality, which helps you control the detail and shadows of your rendering.
In addition to the greater control and customization the General, Camera, and Quality tabs offer, you can use different backgrounds in your renderings. As mentioned before, this rendering freedom that’s available directly in your production’s model can save you time and increase your productivity.
Better Renderings = Bigger Impact
To discover the full potential of Vectorworks Spotlight's rendering capabilities and truly impress your clients with impactful presentations, click the button below:

