In this post, we’re going to examine the tools and capabilities in Vectorworks Architect that are instrumental for the construction documentation phase.
Make sure you’re caught up on our analyses of the first three phases, because several of the tools and capabilities mentioned will come into play again in construction documentation.
- Phase by Phase with Vectorworks Architect | Predesign
- Phase by Phase with Vectorworks Architect | Schematic Design
- Phase by Phase with Vectorworks Architect | Design Development
If we think of construction documentation as a set of instructions for contractors, then it follows that we’ll want to be as accurate and detailed as possible. This can be time consuming without the right tools. Vectorworks ultimately saves you tons of time when producing construction documents in a variety of ways. These include:
- Sections & elevations
- Details
- Data tags
- Title blocks
- Publishing commands
- Cloud computing via Vectorworks Cloud Services
Using Smart Markers, Plus Coordinating Annotations & Title Blocks
Sections & Elevations
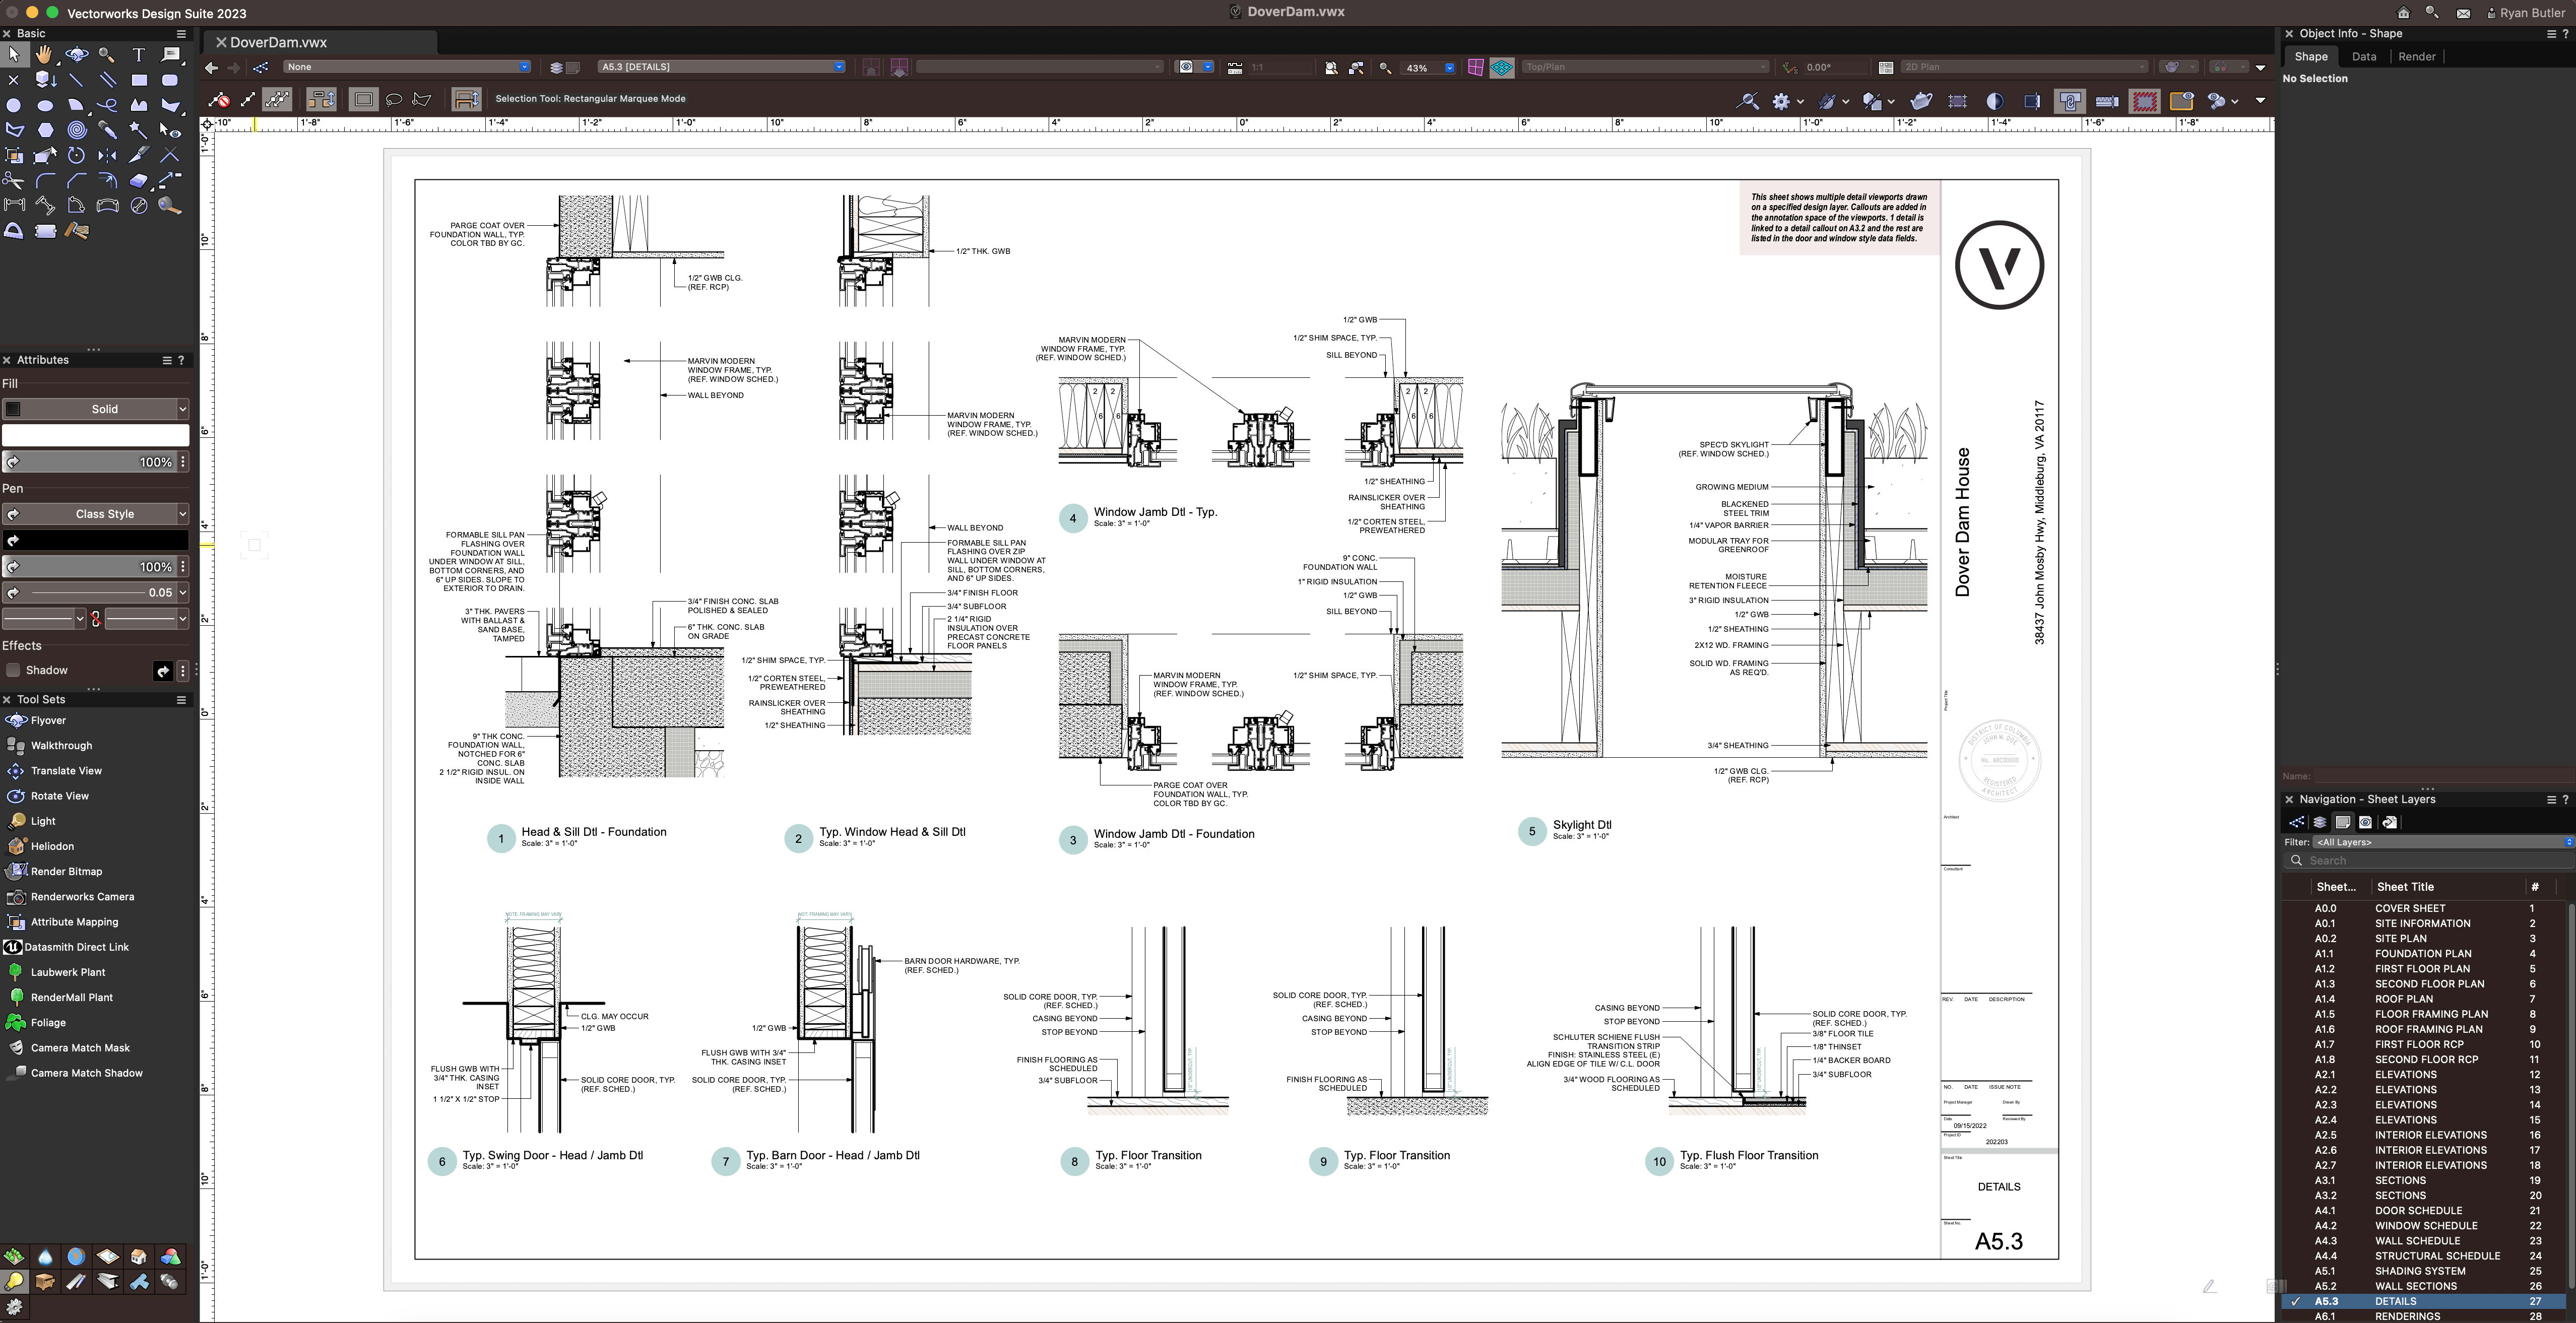
Creating detailed drawings of buildings is an essential aspect of architectural project delivery. To achieve this, there are several tools and techniques that can be used.
One of the main methods is to use viewports, which enable you to create plans, elevations, sections, interior elevations, and details without having to redraw the entire building.
To create an elevation view, for example, you can go to the View menu and select Create Viewport. From there, you can choose an orthogonal view with hidden line rendering to create an accurate and detailed view. It’s that easy.
Once you have created the viewport, the next step is to fine-tune the surface hatches within the material resources. You can add annotations and other linework as necessary in the annotation space after the viewport is placed on the sheet. The same workflow applies to creating interior elevations viewports using the Create Interior Elevation Viewport command from the View menu.
When it comes to section viewports, go to the View menu and select Create Section Viewport, followed by drawing the section line. This method offers section style settings, which allow you to decide whether to show the components within the section cavity or merge them together with a fill or hatch, based on classes. Additionally, the cut plane graphic attributes and the graphics beyond can be edited via class attributes.

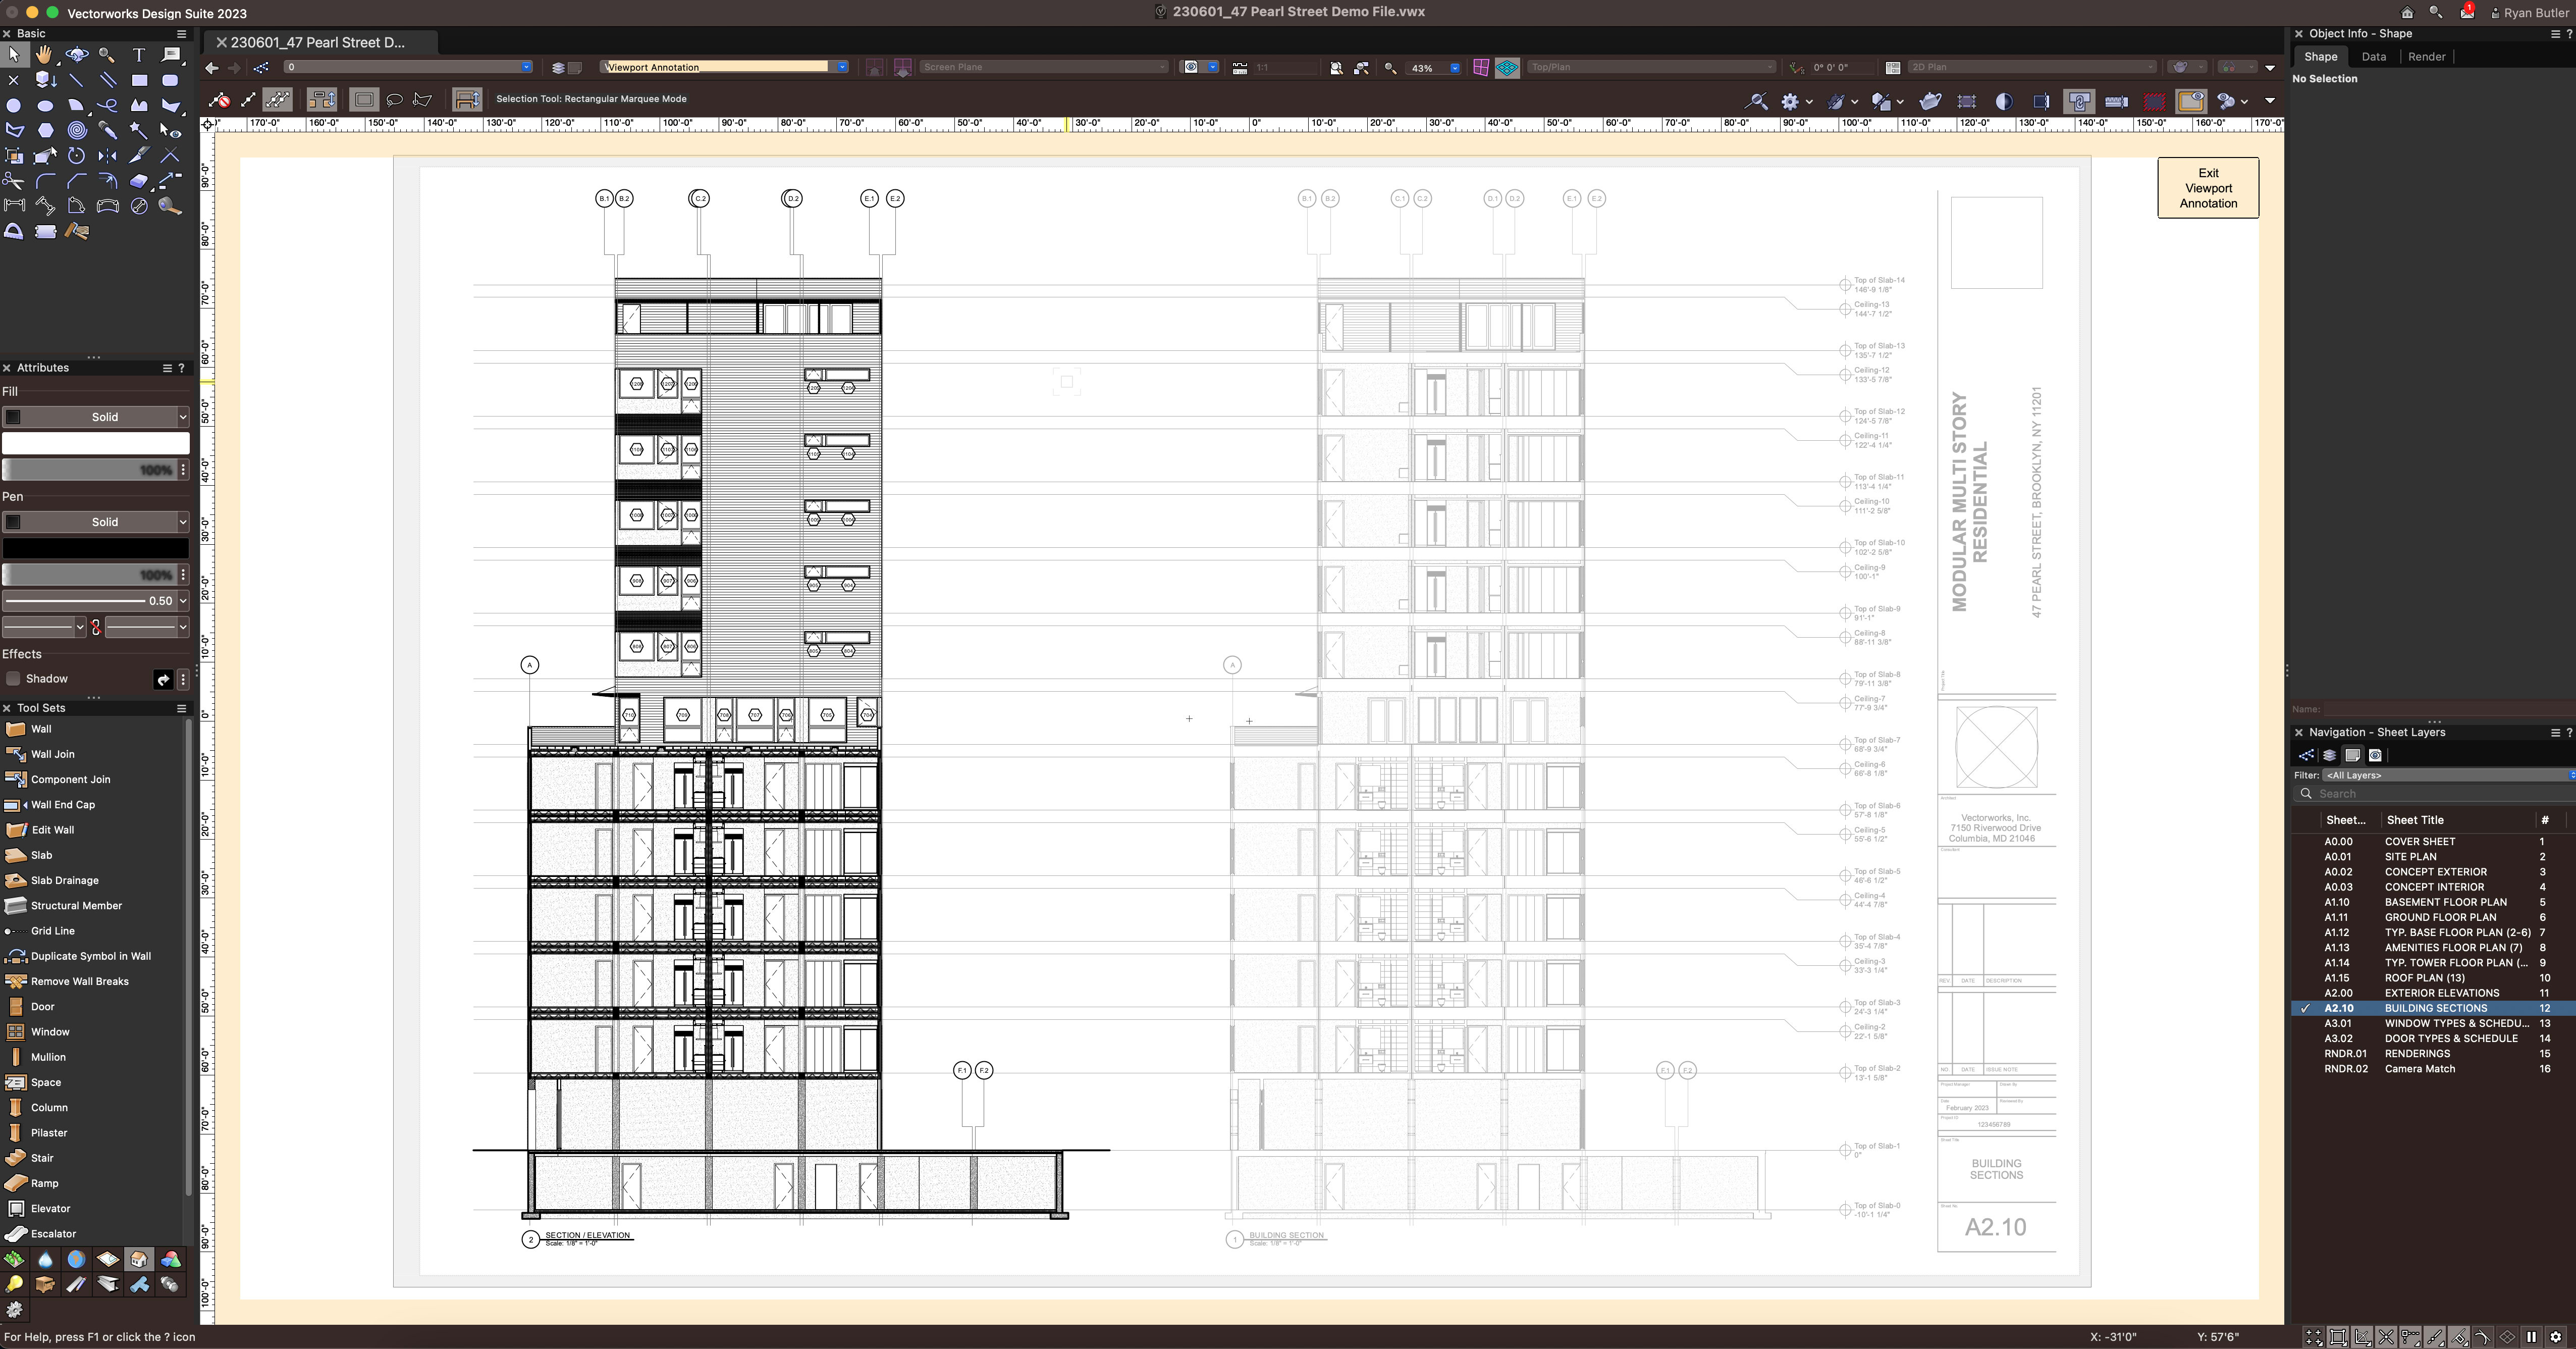
Smart Drawing Coordination
Each viewport has smart markers that can be placed on the plan or section drawings so that you can clearly link the section, elevation, or detail drawing to the marker.
These smart markers can be customized graphically, and there is the capability to navigate through the drawing set by clicking the marker and jumping to the viewport on the appropriate sheet. That’s right, they act like hyperlinks!
What's more, when there’s an update, such as a drawing number or sheet number change, or if the drawing moves to a different sheet, the smart marker updates so that you don't have to redo all the markers.
Moreover, a great bonus when exporting drawing sets to PDF is that smart markers will retain their hyperlink behaviors allowing easy navigation for everyone collaborating on the project.
All of these tools and techniques make the process of creating detailed drawings much more efficient and effective, helping to streamline the documentation process.
If you’re interested in seeing smart markers in action, this free course will show you all about how to use these game-changing features.
Data Tags
Data tags are a vital aspect of creating a comprehensive set of construction documents. They allow you to label and organize all the elements of your project in an efficient and intelligent way. With the Data Tag tool, you can quickly tag data from windows and doors to finishes and walls, for example. These tags include customizable labels, and the data displayed is linked to the building object, which allows for automatic updates as you make changes.
Whether you're working on a small residential project or a large commercial development, using data tags can streamline your workflow and ensure that every detail is accounted for.
Title Blocks
The Title Block Border tool is a game-changer. It goes beyond being just a mere collection of text and lines on sheet layers, as it has important data attached to it that is crucial for any project. This includes the project name, address, and ID, along with essential details like the drawing stamp, revisions, and sheet name.
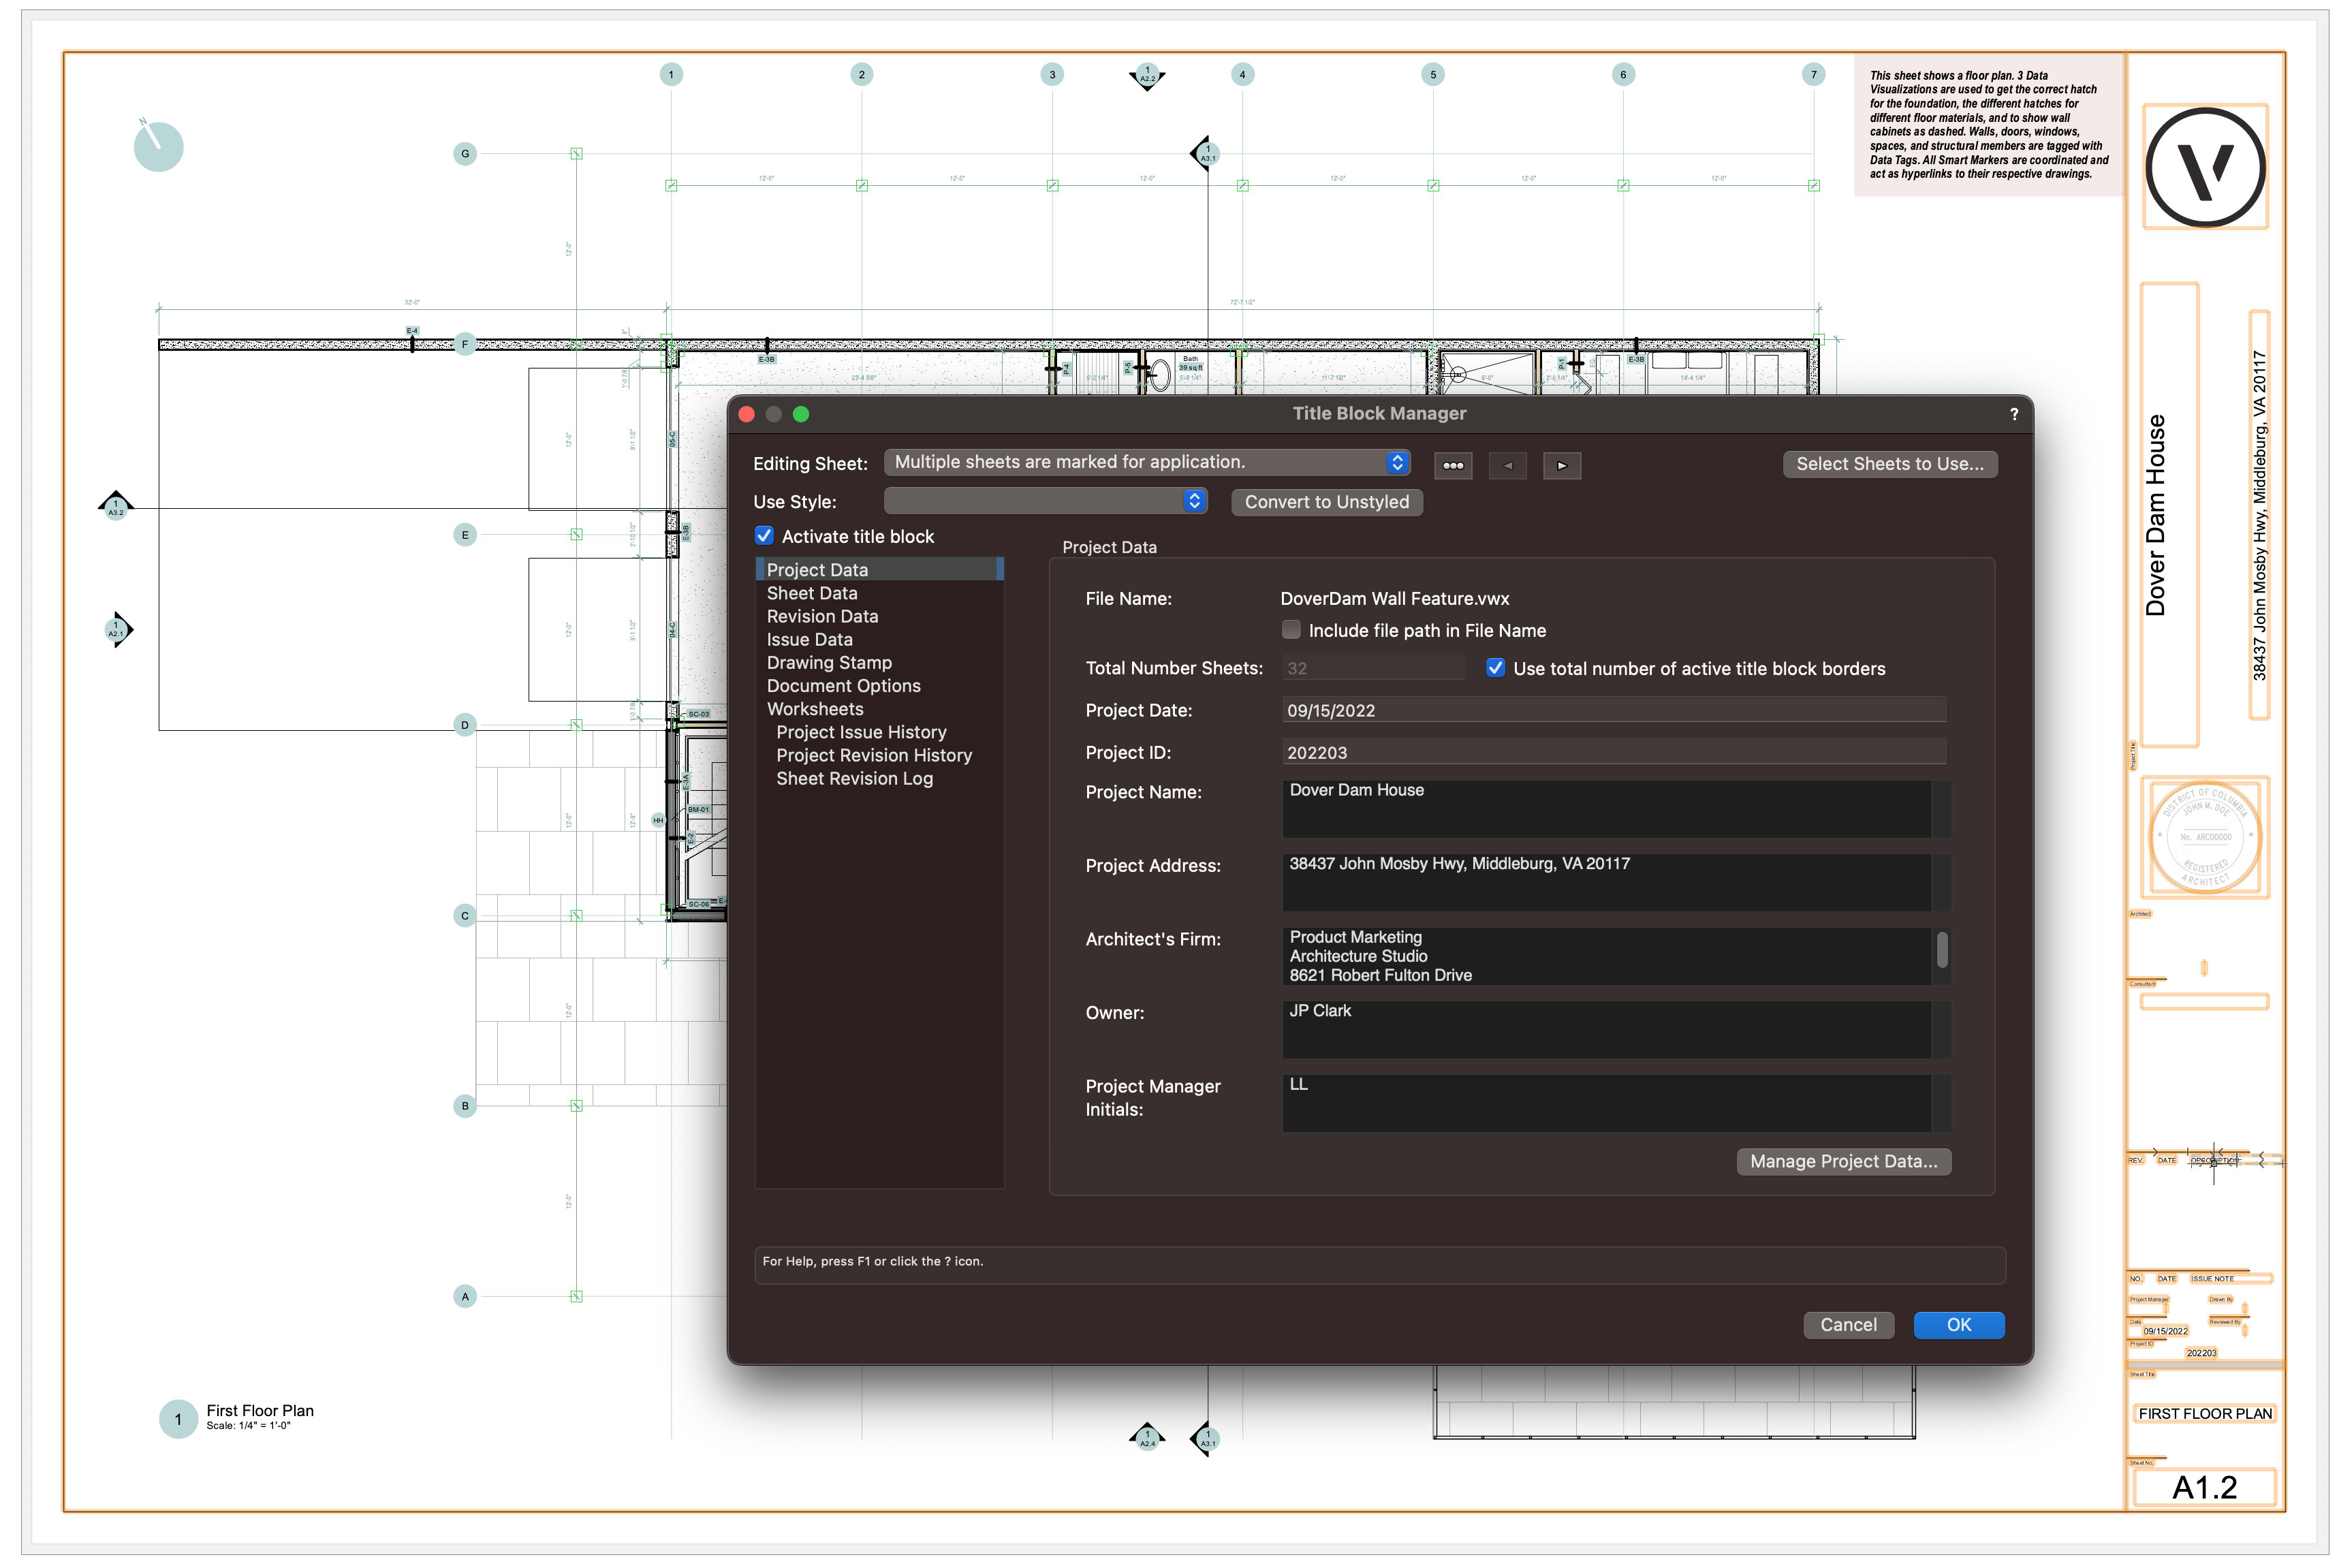
But that's not all — there are even more settings that allow you to customize the title block even further to fit your specific needs. From adding images to including more text objects, the possibilities are endless. What's more, each text object is linked with the data, making it effortless to include on the title block.
The title block functions as a style, meaning that when you edit the layout, all the sheets will update accordingly. This not only saves you time but also ensures that your entire project stays organized and consistent. Plus, with the Title Block Manager, you can easily input data and select which sheets to edit, whether it's just one or all of them.
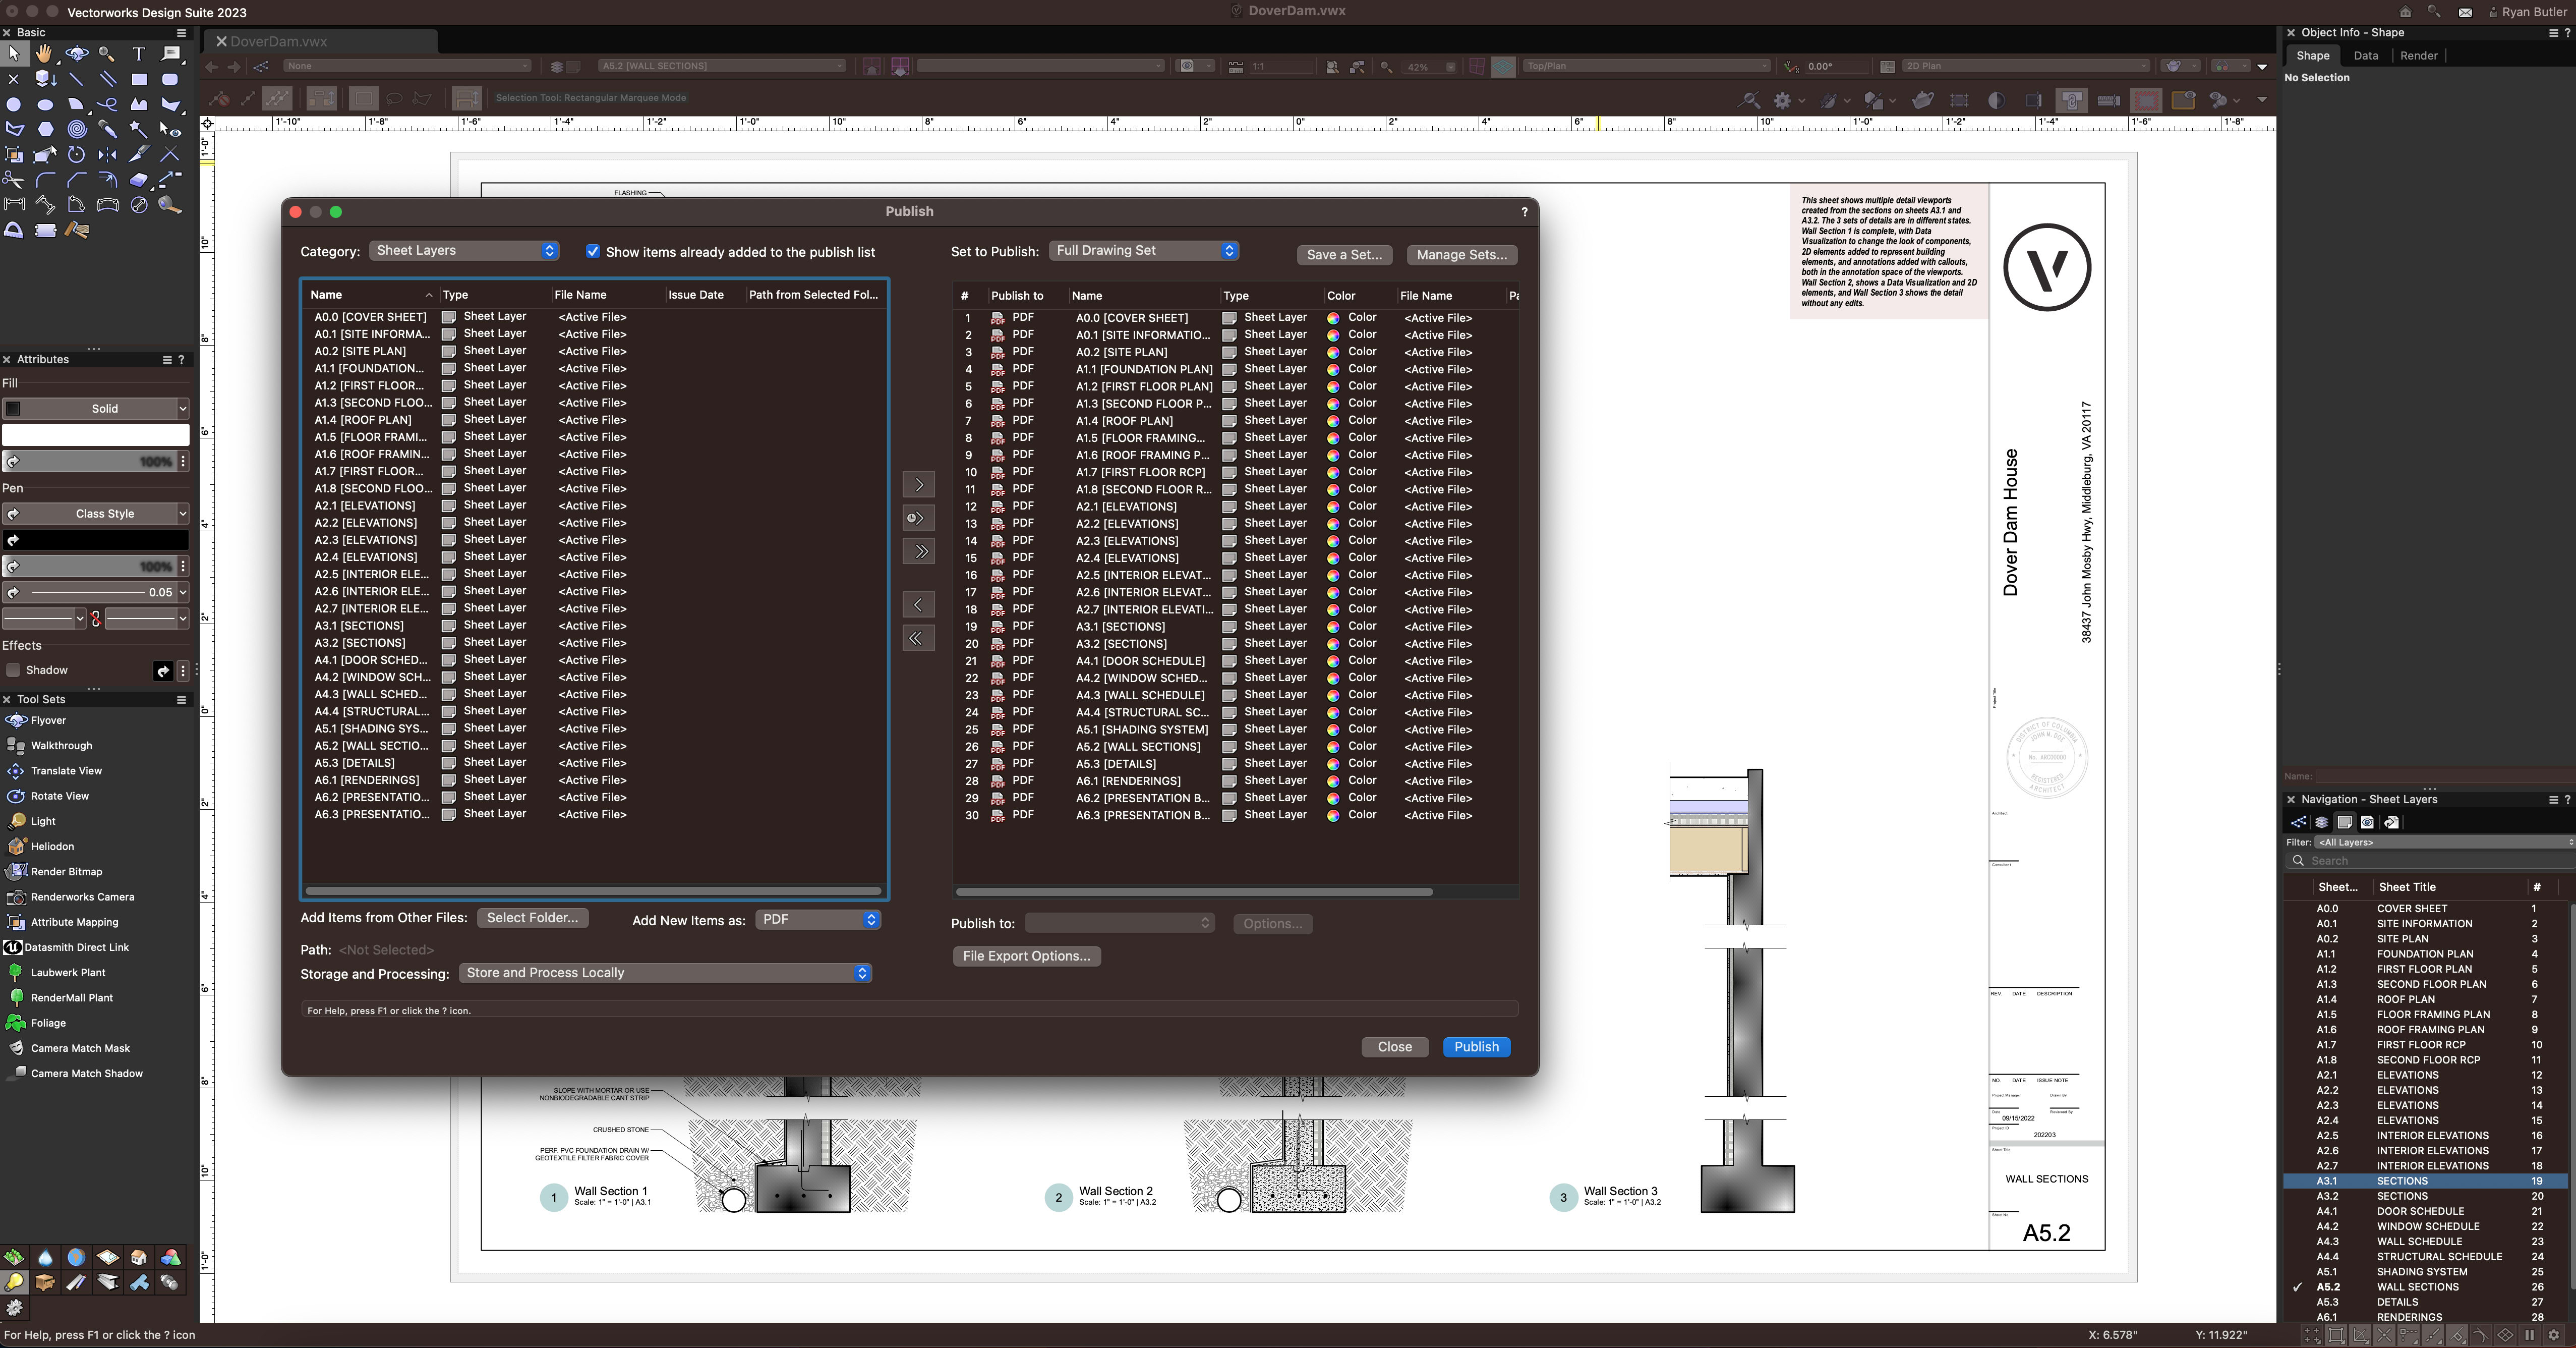
Collaboration & Publishing
With the batch publishing feature, you can easily select the sheets and saved views you want to publish without having to do it one by one. This saves you a lot of time and effort, making the process more efficient. Publishing will also update your viewports, so you don’t have to go through each sheet to update them before publishing.
The Publish command in Vectorworks can be used to produce a variety of file types, including PDF, DWG, and image file types. Publishing to PDF and DWG formats comes in handy because there will be updates that need to be exchanged with consultants to keep everyone on schedule.
Moreover, there are file export options and PDF settings that you can adjust to your liking. You can choose between grayscale or color, black and white, and even save presets for sheets. The DPI and file size reduction settings are also useful for optimizing the final output while keeping the quality intact.
But what happens when you need to update several viewports or re-cook a rendering? This is where Vectorworks Cloud Services comes in handy. Let the Cloud do the heavy lifting and publish your drawing sets for you while you continue working on other tasks. This feature is a lifesaver, especially when you have tight deadlines to meet.
Plus, with your Vectorworks Cloud Services account, you can integrate Bluebeam Studio and collaborate in real time using your published set of documents and Bluebeam Revu.
Overall, publishing and Cloud Services are essential tools for architects and designers who want to create high-quality designs efficiently and effectively. With these features, you can save time, optimize your output, and focus on what really matters – designing.
Stay in the know with the latest insights
Subscribers receive news, customer stories, success and learning tips, event information, and other important announcements form Vectorworks.
By submitting this form, you agree that Vectorworks, Inc. and its authorized partners may contact you in regards to news, offers, and the use of our software, services, and platforms. Learn more about our privacy practices and your data on our privacy page.*