.svg)


This blog is written by Damian Keeley, a UK-based architect with over 20 years of experience and his own firm, Size Architects. To read Keeley’s first guest blog with Vectorworks, “Back to BIM Basics | Early Project Setup in Vectorworks,” click here.
. . .
In the past, you may have used tracing paper to add overlays to an existing drawing. This could help you take a drawing of, say a site, and overlay site development options on sheets of tracing paper without having to redraw the site drawing.
With this old technique, you could apply design proposals and sketch layouts to test the site quite quickly.
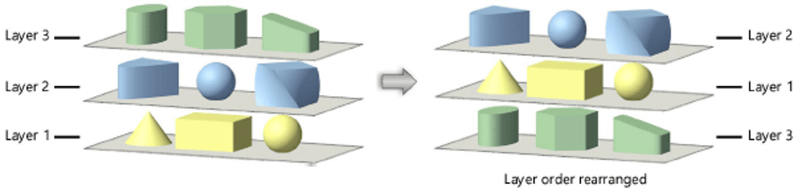
You can adopt a similar technique using layers in Vectorworks Architect. As the title of this blog post states, these are incredibly helpful ways to stack information on top of itself.
I find layers very useful containers within which to put geometry by location or level, such as tree canopy, floor levels, or furniture layout. They can also be used alongside classes to create a more granular organizational structure during more conceptual phases.
Similarly, when looking at various floor finishes, or calculating areas of zones, layers provide a useful method for mining and filtering the data you need.
Layers are undoubtedly very useful, and your imagination will be the only limitation in how to use this foundational feature of Vectorworks. Have fun with what you create and figuring out your own workflows and enjoy using this sophisticated, easy-to-use feature in your projects.
Overview: Layers
Within Vectorworks, there are two different kinds of layers: Design layers and Sheet layers.
Design layers are used to draw and model the elements of a project. They contain your drawing items and can be stacked, hidden, scaled, and reordered. Design layers display with a thin gray border (when the page boundary is displayed).
Sheet layers are used to create presentation versions of the finalized drawing. This can include viewports, title block borders, notes, and other annotations. Sheet layers are always at a 1:1 scale, and they are set to Active Only visibility and Top/Plan view, though the viewports displayed on a sheet layer can be displayed at different scales, views, rendering modes, etc. Sheet layers display a wide gray border representing the print margin area.
For more background on layers, watch this video:
Using Layers to Inform Your Designs
Layers are found next to Classes on your toolbar.
By clicking on the layer stack icon, it’s possible to edit the properties of existing layers and add new layers.
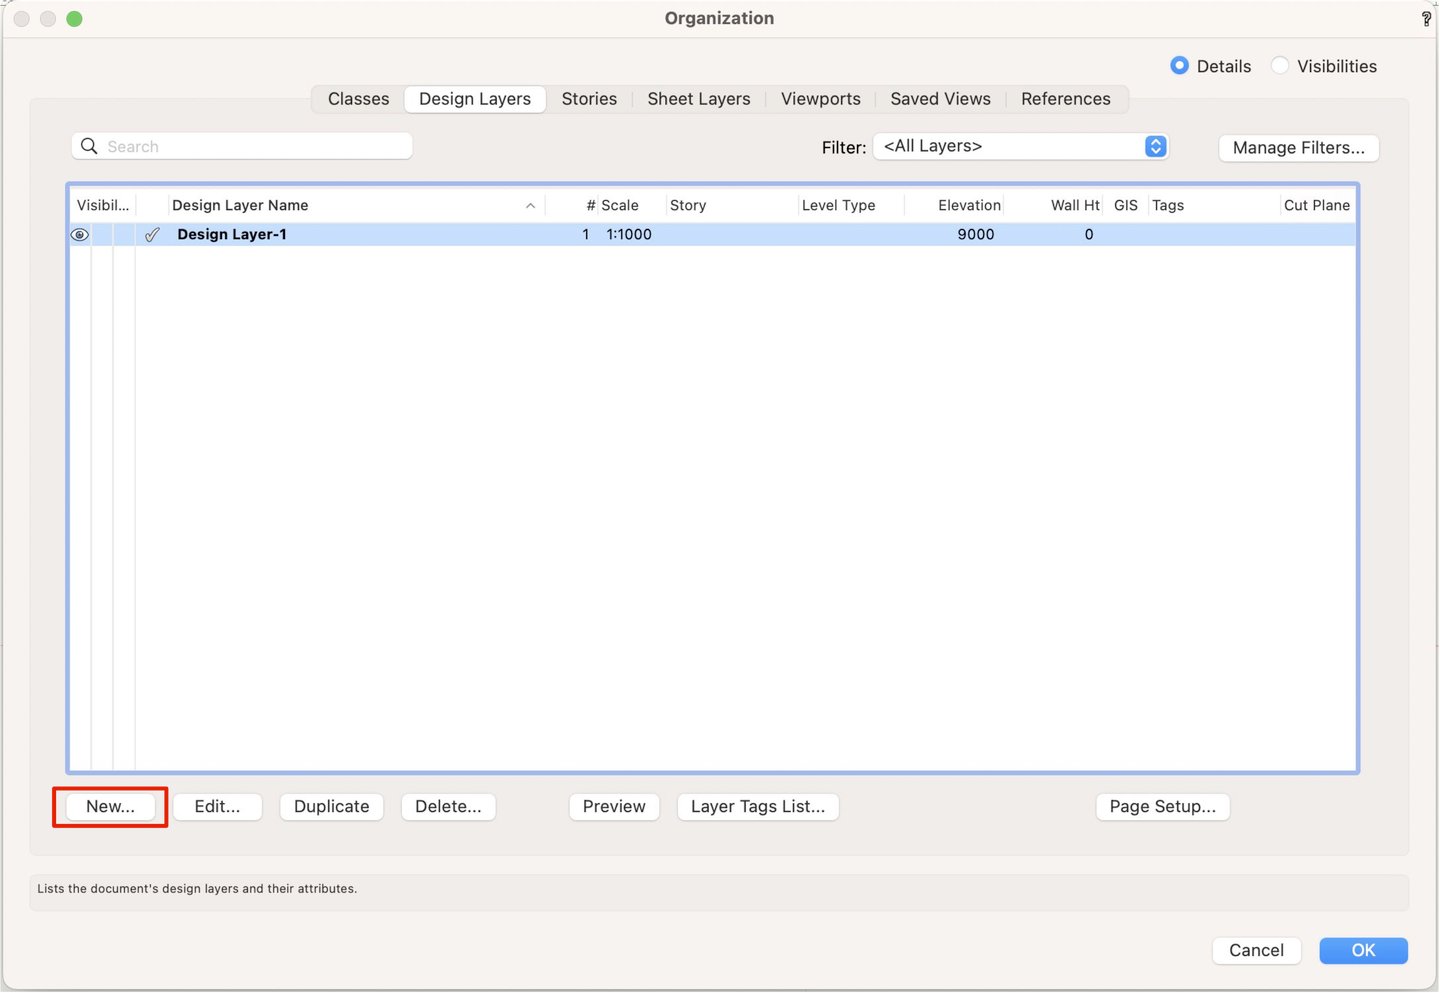
You can click New in the Design Layers tab to add a new layer.
For the purposes of this introductory piece on using layers, I’ll keep it simple and not use any templates to import design layers. For more on using templates in Vectorworks, click here to read “Getting Started with Template Files.”
In this post, we’re just going to select Create a New Design Layer and make sure we tick the box next to Edit Properties after Creation.
After creating a new layer, you’re presented with this dialogue box.
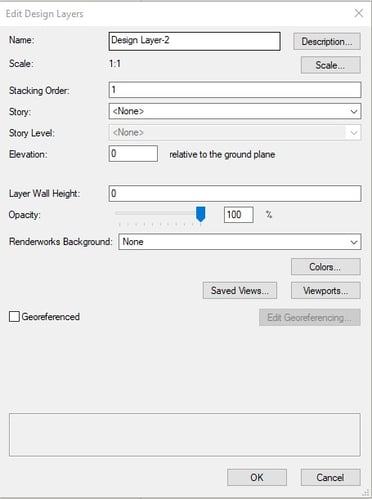
By clicking in the Name box, you can rename the layer to something useful, like “Site Building and Road Layout Option A,” if you’re producing a series of site appraisals.
The scale is set at 1:1 by default, but a tip is to change the scale of these layers so that they’re something like you would want to print them. So, a site layout may need to be 1:100, for example. Also note that if you wish to stack layers on top of each other, they’ll all need to be a coordinating scale to display properly, so set them all to 1:100 in this case as you create your second and third site options.
As you’ll be sketching options in 2D from polygons, the story setting will have little impact on what you’re doing here. So, you can ignore that for now. Similarly, you can ignore elevation and layer wall height for the time being.
The opacity of your layers lets you make an entire layer see-through, so you can layer on top of other layers but still see what is beneath the active layer. This is useful when drawing trees over an existing site layer and making the trees slightly see-through so you can read what is beneath them.

Organizing Information with Layers: An Example
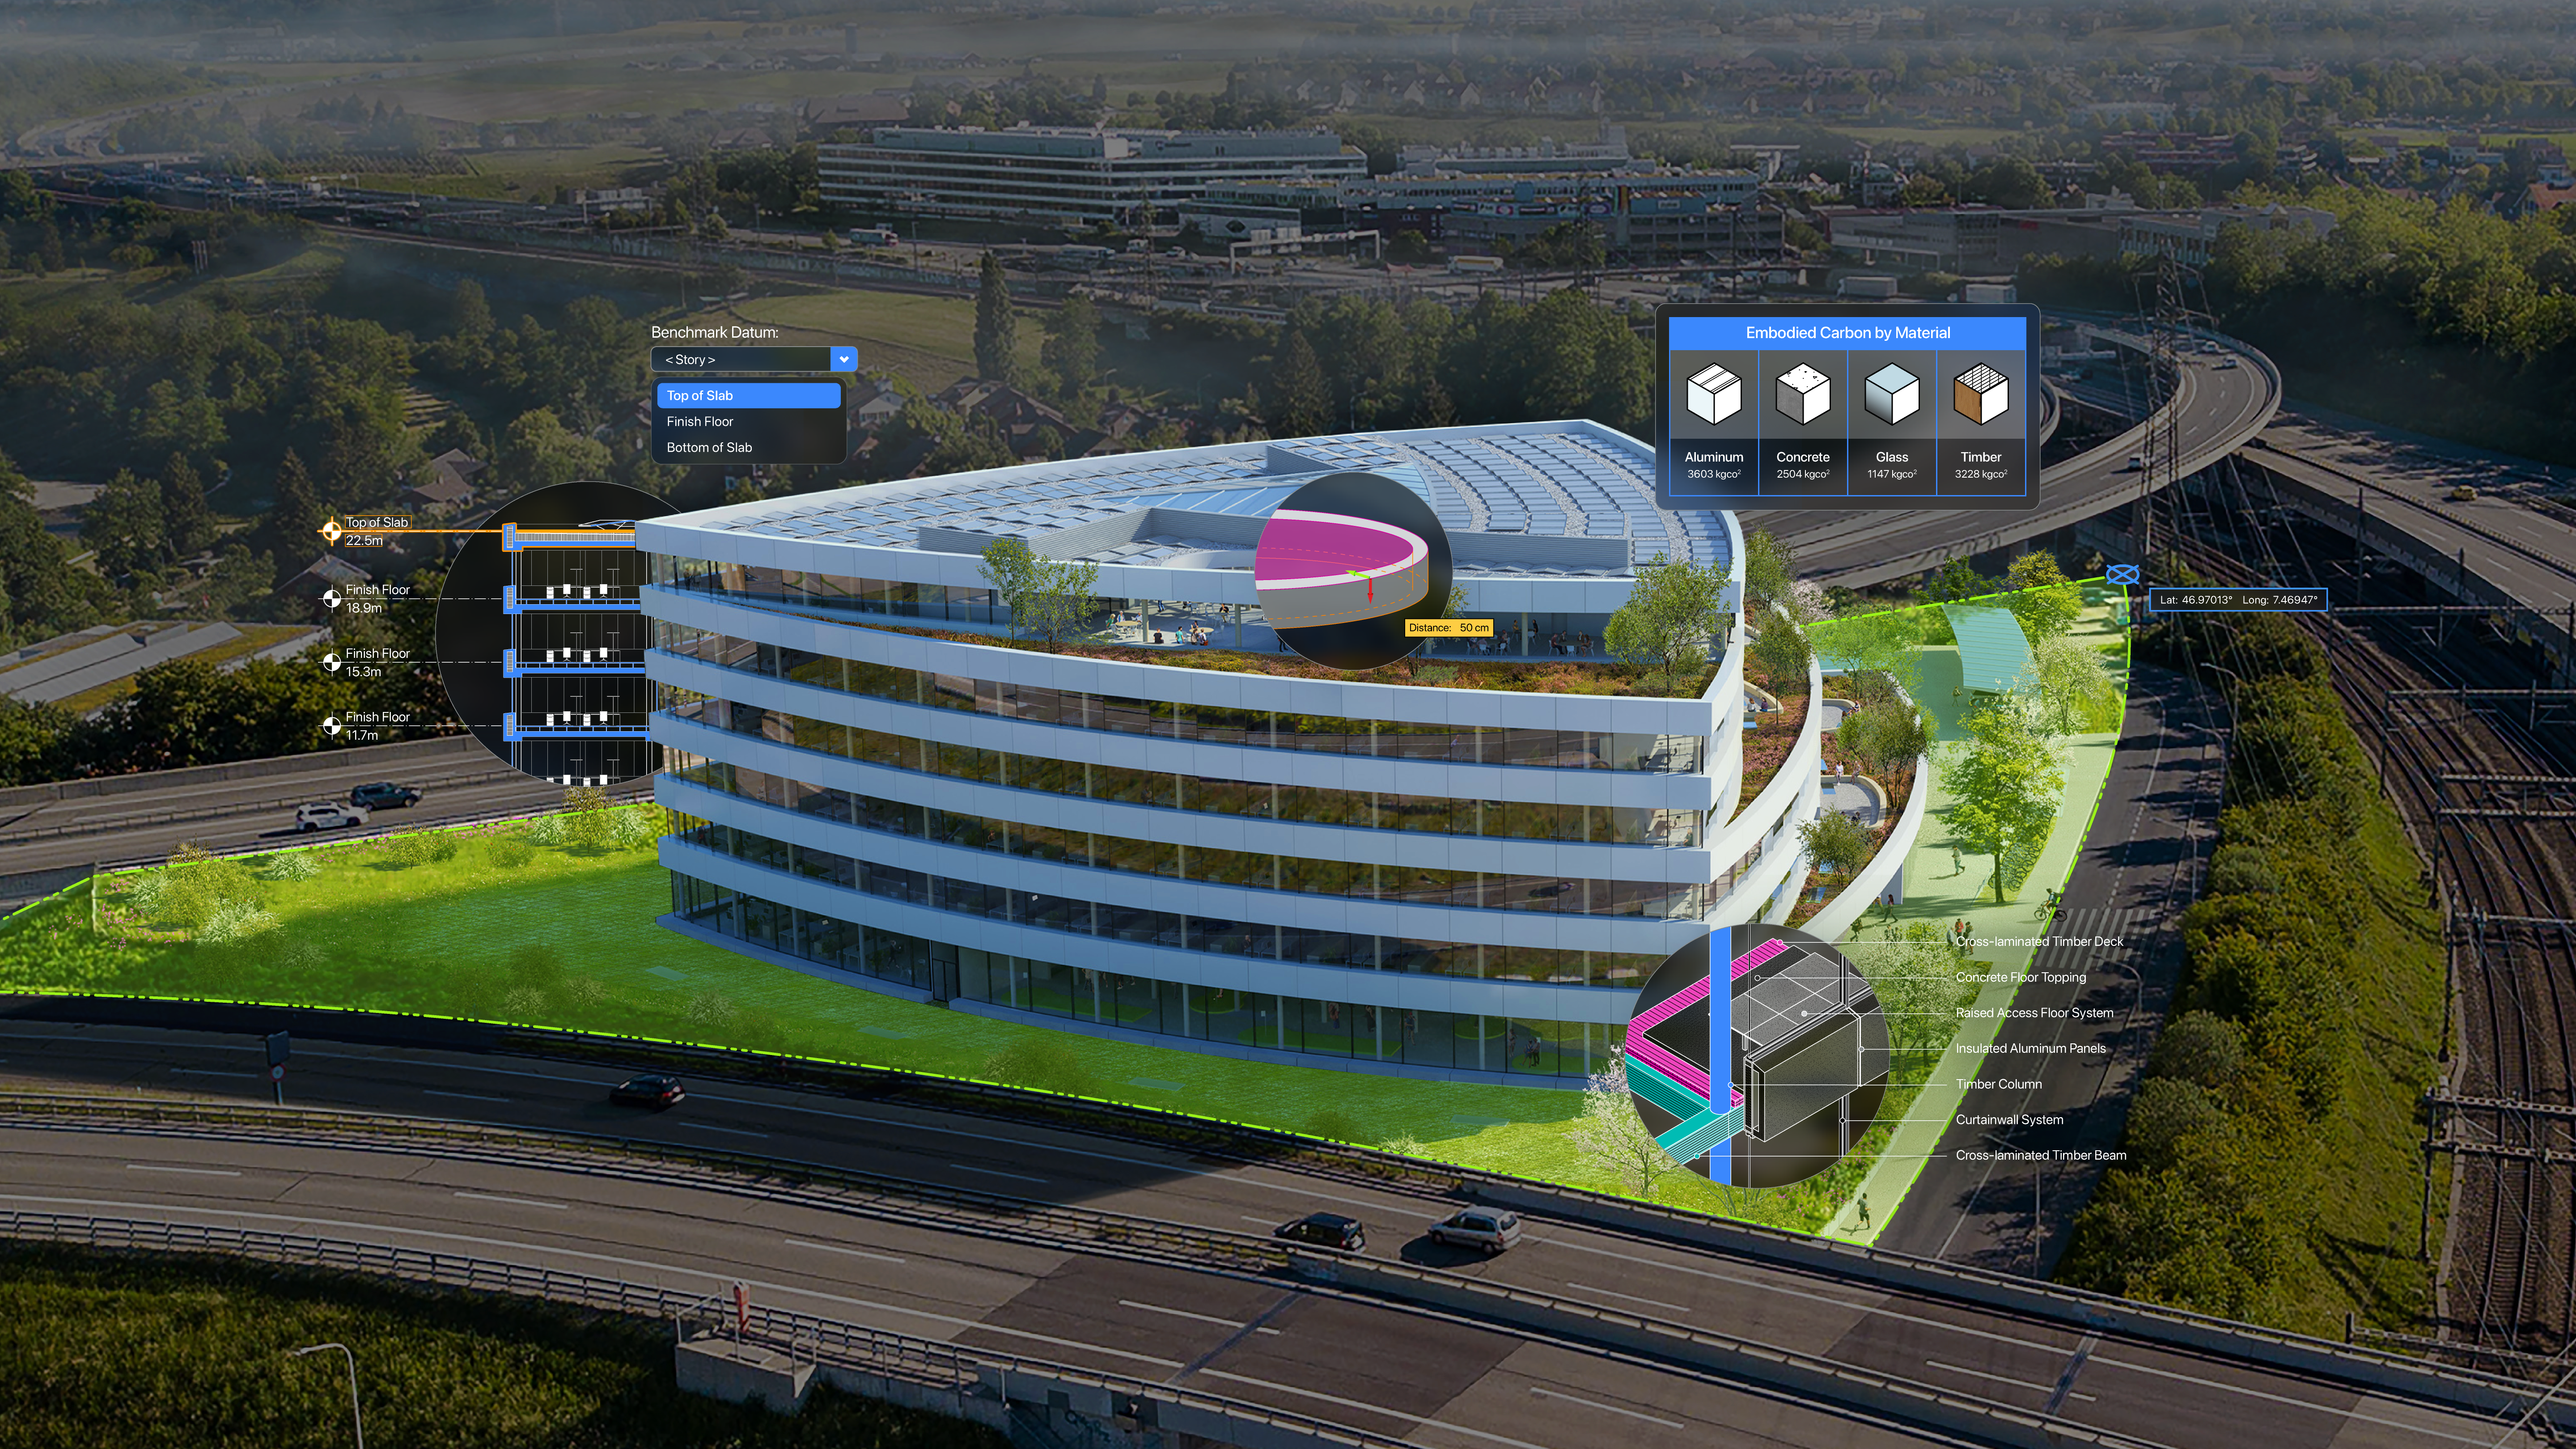
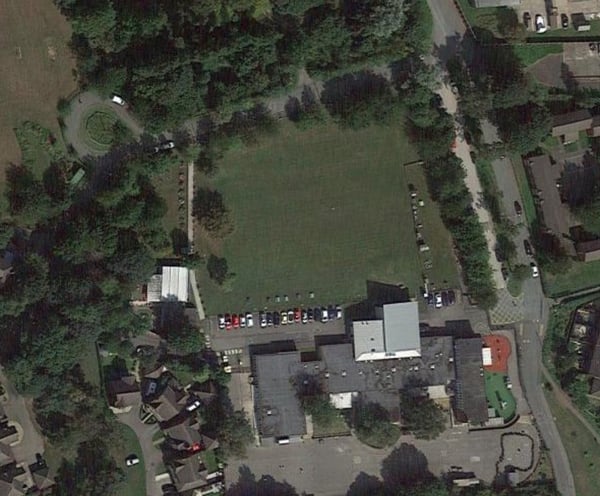
In the following example, I’ve taken a nominal site photograph from Google Earth, scaled it correctly, and shown design options overlaid onto the site as a very quick appraisal of suitable density.
It’s sometimes said that classes are the “what” in your design. For example, the roads, the houses, and the trees. This is opposed to layers, which are the “where.” Classes can be very useful to sketch quickly in layers to determine what site options you may have. As per the following example:
Design Layer 1 has an aerial photograph, scaled to size.
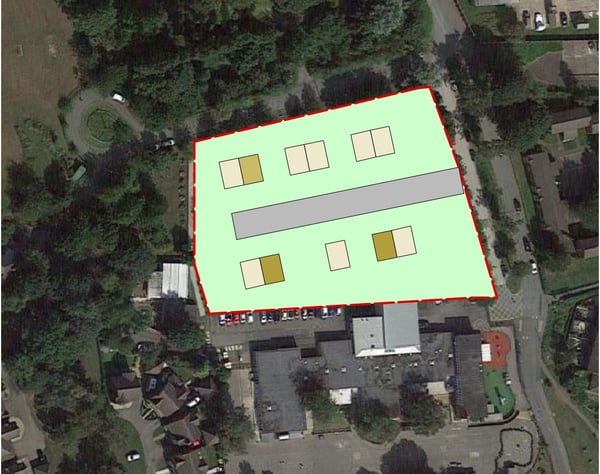
Design Layer 2 has the site identified in a red line with green fill. Design Layer 3 has some indicative housing units sketched out.
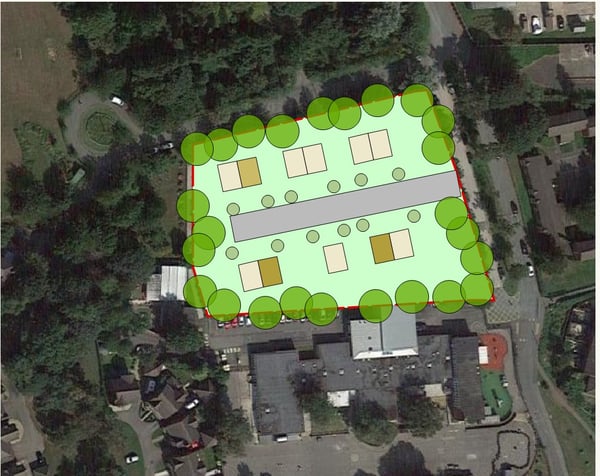
Design Layer 4 has the trees to be retained overlaid with transparency, and new trees on their own class “New trees” also on the layer called “Trees.”
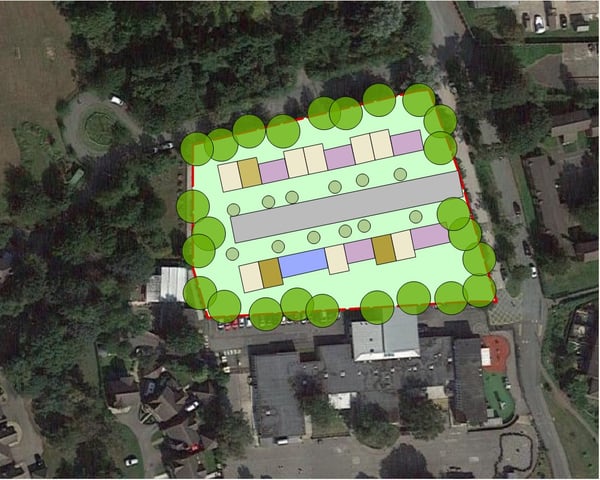
Design Layer 5 offers some infill buildings between the houses, maybe apartments, garage parking, or shops, for example. This layer can be turned on or off independent of the trees and site area.
Adopting the use of layers can be very useful when setting out internal layouts for buildings. You might consider that on one layer you draw your walls, doors, and windows and call this “Ground Floor Building Fabric.” This lets you easily fix the footprint and general arrangement of the building.
Using a second layer for each floor plan to arrange furniture lets you show off several interior design options, and this is especially useful when laying out desk and meeting spaces, tea points, and more in something like commercial office layouts.
Another use might be reviewing options for furniture layout options within open plan apartments or dwellings where the number and size of furniture items may not yet be decided. Using layers and setting the layer view options to view and snap, but not change, means that you can easily amend furniture layouts without amending or altering the building design by accident.
More About Damian Keeley
I work at Size Architects, based in the UK. I specialize in residential projects, including new-build, conversions, and adaptations to existing building fabric and structures.
In setting up a new suite of practice documentation, I will blog what I have learned and discovered through file and template creation and the practicalities of using BIM platforms daily. You can read my first post here, and be sure to follow along for future posts.
I’ll also share the techniques, processes, and tools that help me adopt workflows that simply work, avoid confusion, and pair back the unnecessary jargon. Stay tuned for more blogs!
*Images provided by Damian Keeley.
